Rikomagic RKM R1 is a projector running Android 4.4.4, and powered by Rockchip RK3128 quad core Cortex A7 processor with 1GB RAM, and 32GB storage. It has a particular feature as it comes with a touchpad on the top of the case as we’ve seen in the unboxing and teardown part of the Rikomagic R1 review. Today, I’ll report my experience with the projector playing games in Android, 1080p videos with Kodi 14.2, using the touchpad, and connecting a laptop through the HDMI input port. I’ll also run some benchmarks as usual.
RKM R1 Android User Experience and HDMI Input
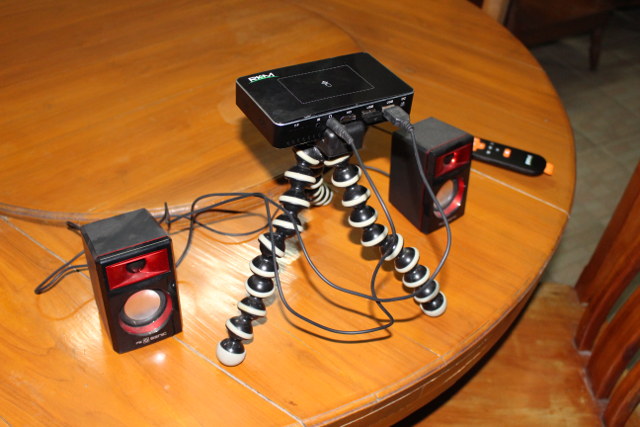
I wanted to relax and use the projector on the bed pointing to the ceiling. RKM R1 comes with a tripod, but it’s quite small, not the projector would fall off, so I used my own tripod, connected a USB keyboard, and the USB RF dongle for Tronsmart Mars G01 gamepad as I planed to play some games.
![]()
Click to Enlarge
I turned it on, and it was already all good to use, as I had already configured WiFi using the touchpad and USB keyboard, and installed various apps and games using Google Play, all without any issue whatsoever. It was a big difference in terms of user-friendlyness compared to Doogee P1 projector when it comes to initial setup, as you don’t need to go through various steps to scan a QR Code, install the control app on your smartphone and so on.
I had my (thick) curtain closed, and once I adjusted the focus with the wheel on the side of the projector the output projector looks like that.
![]()
Click to Enlarge
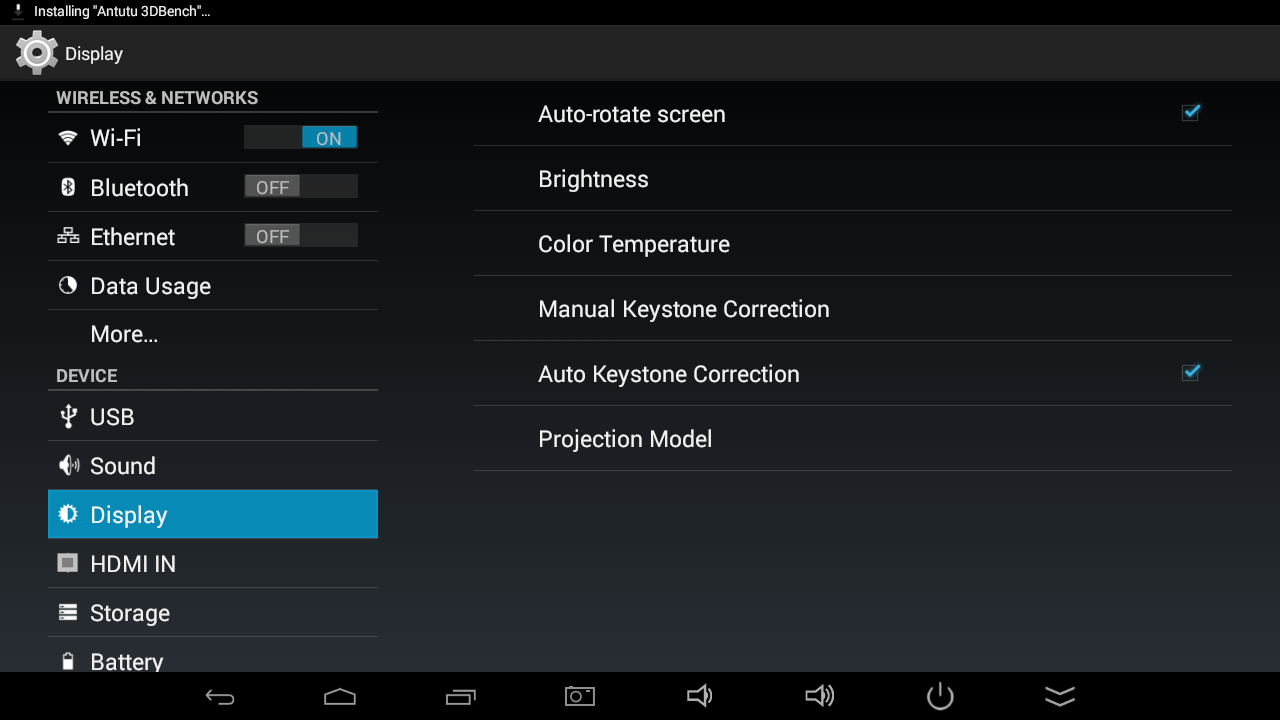
I would have wished for a brighter picture, so RKM R1 is better suited in really dark room or at night. If you want more control about the display there’s a setting section for this. The auto-rotate screen has nothing to do with landscape or portrait like in tablets or phone, but makes sure the bottom of the screen always faces down. For example, if you move the projector from the bed and turn it up to screw on the ceiling it will rotate the display 180 degrees so that it shows properly.
![]()
Click to Enlarge
I started playing Beach Buggy Racing with the gamepad, and it worked very smoothly in the tutorial, but then I noticed some degradation of performance in gameplay. Note that the framebuffer resolution is set to 1280×720 which makes it easier compared to most recent TV boxes where it is set to 1920×1080. Before considering we are using an old Mali-400MP GPU, it’s not too bad, the game as set the maximum graphics setting by default probably due to the low resolution.
By default the volume was very, so I used the remote control to turn up the volume, and while I could hear music and audio effects during the game, the quality was quite poor. I decided to connect my headphones to the 3.5mm audio jack, and the audio was quite saturated. I could eventually find a sweet spot by not pushing the audio jack fully, but obviously it’s not ideal. I would not say the fan is very noisy, but it will be a problem for some people, as it’s noisier than some mini PCs I’ve tried in the past.
I moved the projector outdoors evening time, and connected some USB powered speakers, but sill using the 3.5mm audio jack. I have not mention the power supply simply because the projector is battery powered, and I can last 4 to 5 hours for the projector on playing videos at times, and in the launcher at other times.
![]()
Click to Enlarge
Instead of playing games, I decided to start YouTube to play a few videos, and the only problem I really had was to switch to full screen mode. For some reason the full screen icon on shows a very short time, and when using the touchpad to go full screen I would often switch to another video or jump to the end of the current video. Apart from that, no problem, and the quality is OK, just like the one you may get if you watch a sports event at a bar. Of course this is standard resolution, so don’t expect miracles.
![]()
Click to Enlarge
The touchpad supports multi-finger gestures such as taping with two fingers for going back, or sliding with two fingers upwards for page up, and downwards or page down.
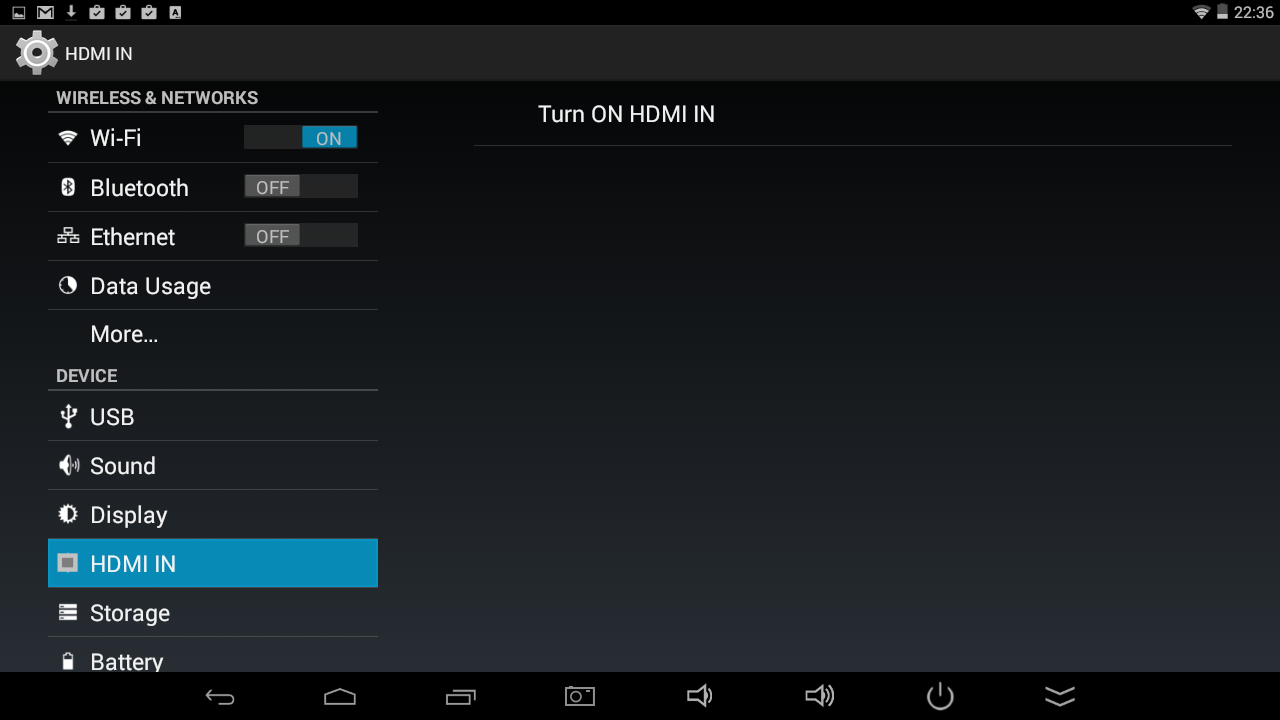
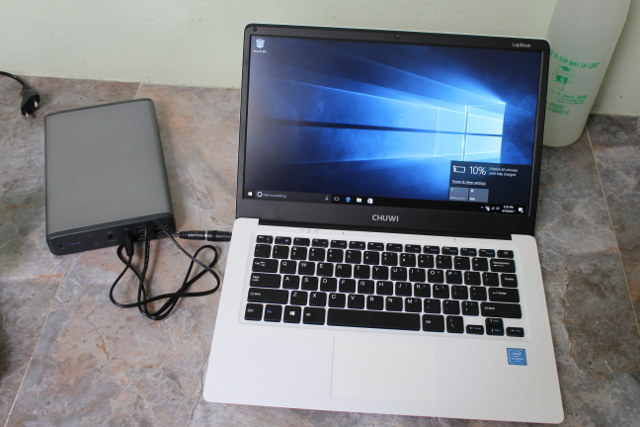
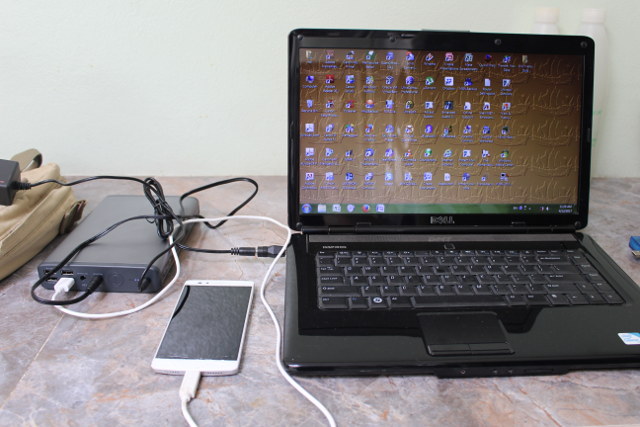
RKM R1 also comes with an HDMI input which can be convenient for presentation or any media that you prefer to play on another device. I connected CHUWI Laptbook 14.1 Windows 10 laptop, and enabled HDMI Input in the settings.
![]() Within a few seconds I could the Windows 10 desktop from my laptop on the projected display, opened a few apps, and played a YouTube video. No problem, except audio saturation in the speakers. Audio really seems to be one of the weaknesses of this projector.
Within a few seconds I could the Windows 10 desktop from my laptop on the projected display, opened a few apps, and played a YouTube video. No problem, except audio saturation in the speakers. Audio really seems to be one of the weaknesses of this projector.
You can watch a quick demo of RKM R1 projector in the embedded video below.
[embedded content]
Rikomagic RKM R1 Kodi Video Playback
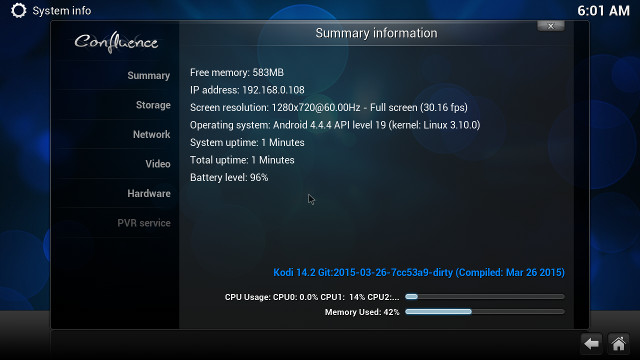
As beside Android 4.4.4, it’s also running the older Kodi 14.2, so RKM R1 feels some sort of time machine, going back about 2 years in times.
![]()
Click for Original Size
Since the projector resolution is 854×480 native, and the video decoder is limited to 1080p60, I’ll skip the usual 4K video decoding and audio pass-through (since there’s no hardware for it), and only went through some 1080p videos (Linaro samples) played over a SAMBA share:
- H.264 codec / MP4 container (Big Buck Bunny) – 1080p – OK
- MPEG2 codec / MPG container – 1080p – OK
- MPEG4 codec, AVI container – 1080p – Plays, but frequent buffering
- VC1 codec (WMV) – 1080p – 1080p – Audio only, frequent audio cuts
- Real Media (RMVB), 720p / 5Mbps – Plays in slow motion (software decode)
- WebM / VP8 – 1080p – Plays in slow motion (software decode), frequent buffering.
- H.265 codec / MPEG TS container – 1080p – Not smooth at all (software decode)
That was no good, so I repeated the tests from a USB hard drive instead, and while I could browse the hard drive, none of the videos would start to play. Last change with a USB flash drive instead (lower power consumption):
- H.264 codec / MP4 container (Big Buck Bunny) – 1080p – OK
- MPEG2 codec / MPG container – 1080p – OK
- MPEG4 codec, AVI container – 1080p – OK
- VC1 codec (WMV) – 1080p – 1080p – Audio only, and it cuts after a while (stuck at 00:08 time mark)
- Real Media (RMVB), 720p / 5Mbps – Plays in slow motion (software decode)
- WebM / VP8 – 1080p – Plays in slow motion
- H.265 codec / MPEG TS container – 1080p – Not smooth at all (software decode)
So it’s clearly not the best platform for Kodi, but if you are only playing the most common videos codec like H.264 or MPEG2, you’ll probably do fine.
Rikomagic RKM R1 System Information
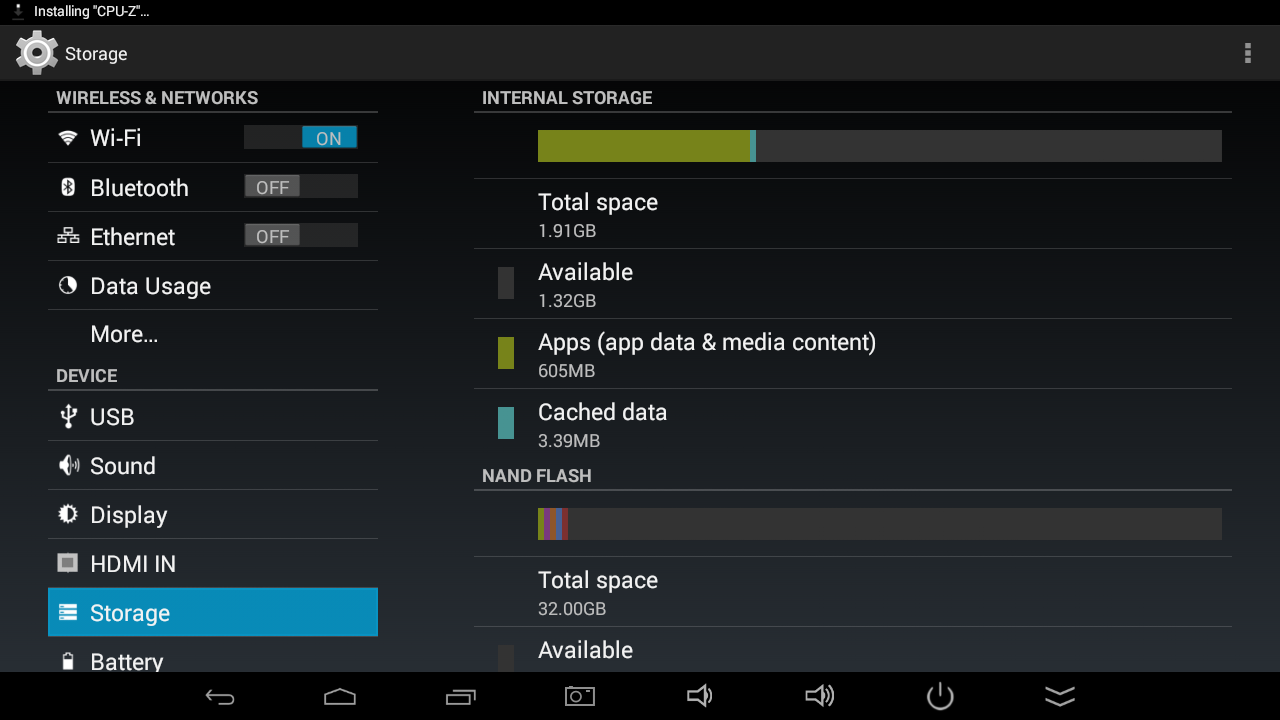
During the teardown I found two flash chips, and since there were advertised as 16 Gbit each on several websites, I believed there was only 4GB storage on the projector, but apparently this is a mistake as there’s just under 32 GB flash on the board with a 1.91GB internal storage partition, and a 32GB (less than that in reality, maybe ~28GB) “NAND flash” partition. The firmware is rooted by default.
![]()
Click to Enlarge
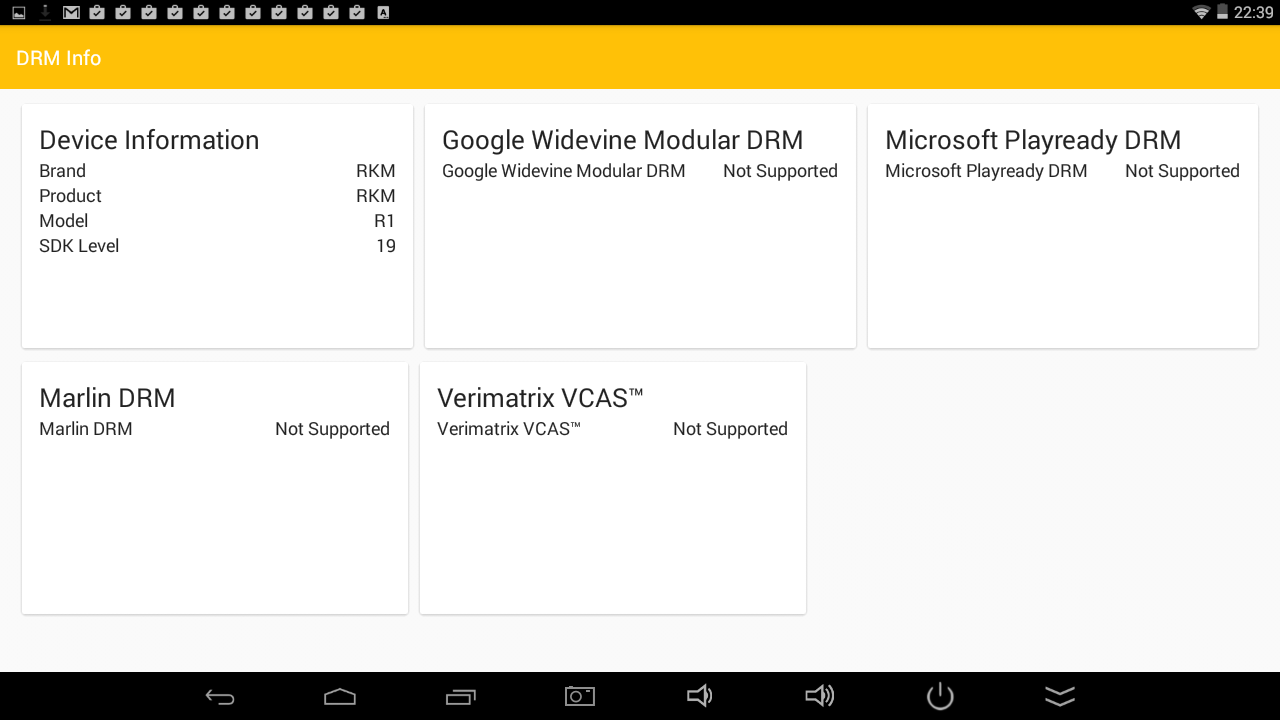
The system completely lacks DRM, but considering the projector is only running Android 4.4, I’m not even sure that’s a problem.
![]()
Click to Enlarge
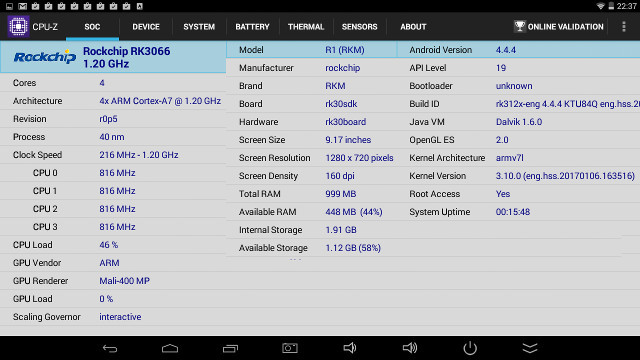
CPU-Z wrongly reports a “Rockchip RK3066” processor, but it gets the rest correct with a quad core Cortex A7 processor clocked at 216 MHz to1.20 GHz with a Mali-400MP GPU. Android 4.4.4 runs on top of Linux 3.10.0 in rk30sdk board. 999MB total RAM is available to the system, but at the time I ran CPU-Z only 448 MB was available.
![]()
Click to Enlarge
Rikomagic RKM R1 Benchmarks
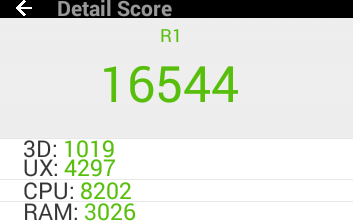
Antutu 6.x confirms Rockchip RK3128 is not exactly a beast, and the projector performance may not satisfy everybody, depending on which apps you play to run. Performance may not be that important if you only plan to watch videos, or use the HDMI input.
![]()
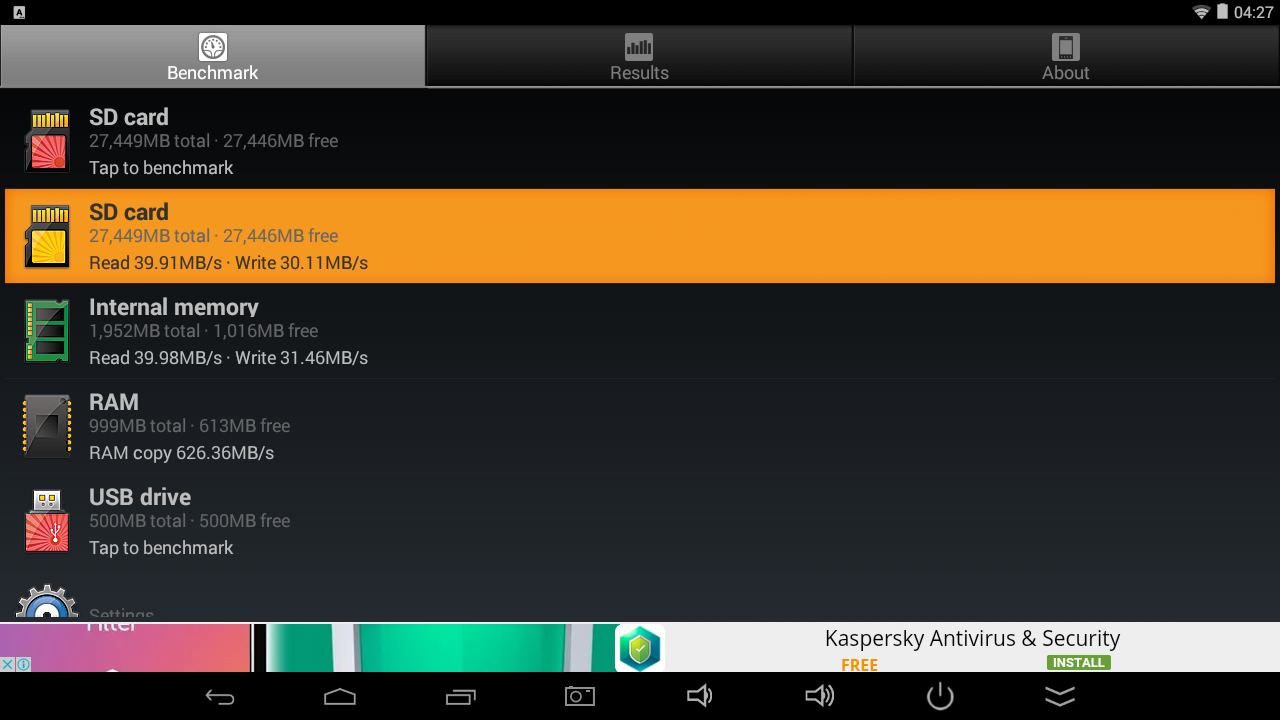
While the processor is slow I never had “app not working: windows, likely because the internal flash performance is quite decent at 39.91 MB/s (R) and 31.46 MB/s (W)
![]()
Click to Enlarge
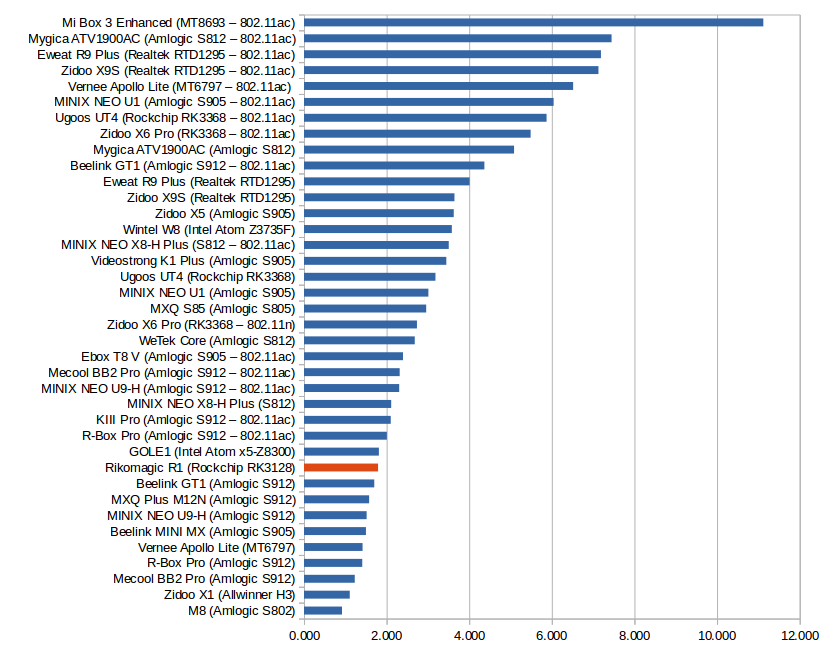
Finally, let’s have a look at network performance by copying a file over WiFi + SAMBA with ES File Explorer in both direction. The results are rather weak (1.8 MB/s on average), and may explain why some videos were buffering in Kodi.
![]()
WiFi Throughput in MB/s – Click to Enlarge
I also did some tests with iperf in case the culprit is SAMBA as with Amlogic Android Marshmallow firmware, but results with iperf are also rather low (about 3 MB/s):
Upload:
|
|
Server listening on TCP port 5001
TCP window size: 85.3 KByte (default)
––––––––––––––––––––––––––––––
[ 4] local 192.168.0.104 port 5001 connected with 192.168.0.112 port 36524
[ ID] Interval Transfer Bandwidth
[ 4] 0.0-60.1 sec 198 MBytes 27.5 Mbits/sec
|
Download:
|
|
Client connecting to 192.168.0.112, TCP port 5001
TCP window size: 85.0 KByte (default)
––––––––––––––––––––––––––––––
[ 3] local 192.168.0.104 port 40716 connected with 192.168.0.112 port 5001
[ ID] Interval Transfer Bandwidth
[ 3] 0.0-60.0 sec 159 MBytes 22.2 Mbits/sec
|
Conclusion
Rikomagic RKM R1 Android projector works much better than Doogee P1, is much easier to use, and also comes with HDMI input. The projector is also mostly bug free, and I had almost no problems playing YouTube videos, but that does not mean the user experience is perfect. First the processor is quite low end, and relying on older software like Android 4.4 and Kodi 14.2, possibly because of all the extra work needed to make the DLP projector work.
PROS
- Mostly bug-free and responsive firmware
- Projector works well in dark room
- The touchpad on top of the project is an amazing idea, and works really well, also supporting multi-finger gestures.
- HDMI input to connect another computer or laptop
- Built-in battery that last about 4 to 5 hours with the projector
- Google Play install, and no problem to install and use apps such as YouTube
- OTA firmware update appears to be supported
CONS
- Low end SoC with quad core Cortex A7 and Mali-400MP GPU
- The projector runs somewhat older software: Android 4.4 and Kodi 14.2
- Kodi 14.2 does not work with all video codec, for example H.265 and VC1 are not supported
- WiFi performance is rather poor
- Built-in speaker of low quality, and audio is often distorted or saturates via the 3.5mm audio jack (headphone and external speakers)
- Lack of DRM support
- Higher brightness would be beneficial in some situations
- Focus appears to be slightly different on left and right sides of display (at least with my sample)
I’d like to thank Rikomagic for providing a sample, and if you are interested you could purchase the projector for around $246 shipped by DHL, or if you plan to order in quantities, contact the company via the product page.
Tweet Rikomagic RKM R1 is a projector running Android 4.4.4, and powered by Rockchip RK3128 quad core Cortex A7 processor with 1GB RAM, and 32GB storage. It has a particular…
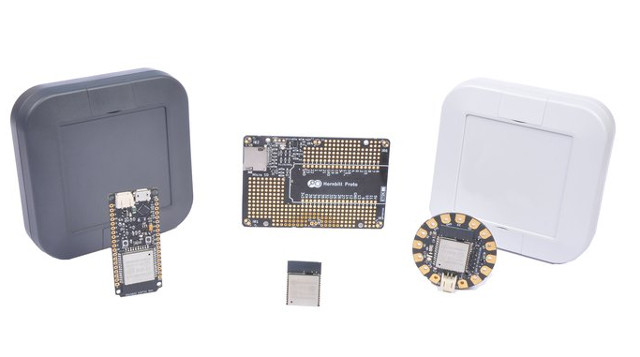
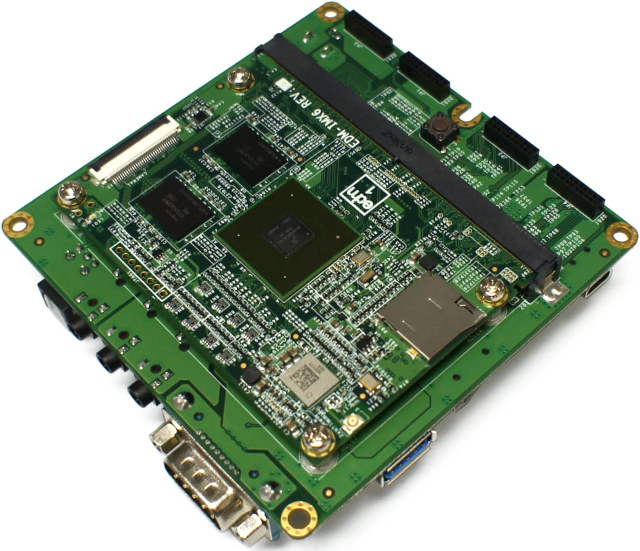
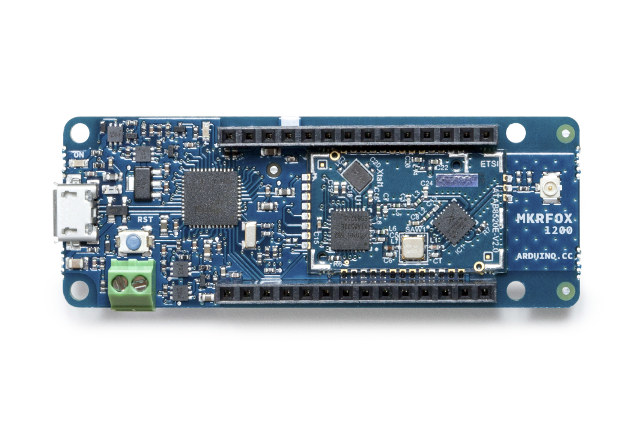
 UDOO BLU and BLU SENSE specifications:
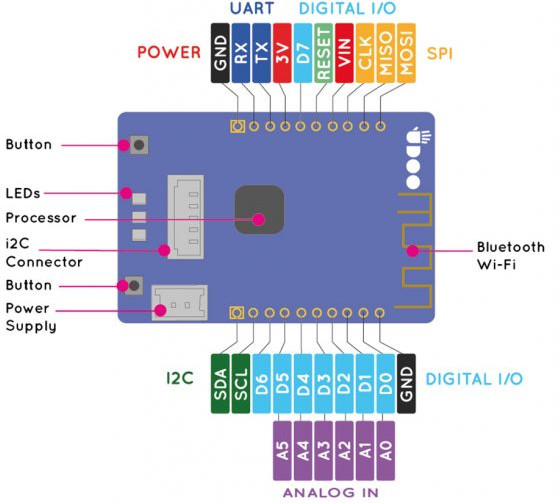 The company is already taking pre-orders for BLU ($17.50) and BLU SENSE ($19.50), and more information may be found on UDOO BLU product page. The company is also attending DROIDCON Italy 2017 in Milan, where you’ll be able to see BLU boards, and other UDOO boards in action, and the company will give some boards away as part of a Hackathon on April 8-9.