Last year, I reviewed U4 Quad Hybrid, an Android TV box powered by Hisilicon Hi3796M quad core Cortex A7 processor and with a combo DVB-T2/C + DVB-S2 tuner. with digital TV tuner. It worked pretty well, except for a few bugs here and there, the processor is not the most powerful, and video output & decoding is limited to 4K @ 30Hz. The company – Shenzhen Vivant Technology – is now back with a new model called U5 PVR powered by a more powerful Hisilicon Hi3798C V200 quad core Cortex A53 processor with fast interfaces like USB 3.0, SATA, and Gigabit Ethernet, as well as support for 4K @ 60Hz via a HDMI 2.0a interface. There are actually three variations of U5 PVR with Deluxe/Slim/Normal models, and the company sent me U5 PVR Deluxe model for review. As usual, after listing the specifications, I’ll start the review by checking out the hardware, before reporting my experience with the firmware in the second part.
U5 PVR Deluxe TV Box Specifications
The TV box has some pretty impressive specifications:
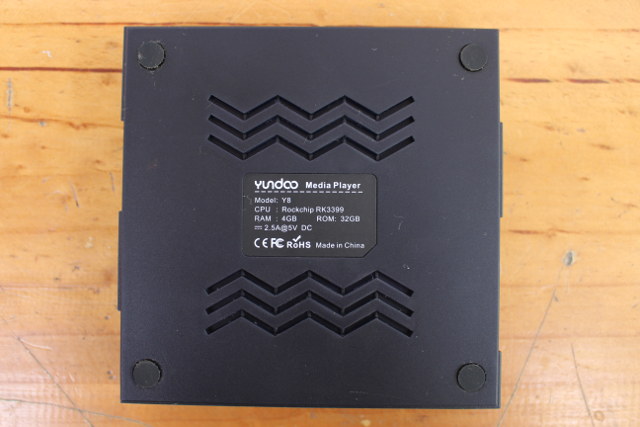
- SoC – Hisilicon Hi3798C V200 quad core Cortex A53 processor + multi-core ARM Mali-T720 processor
- System Memory – 2GB DDR4-2133 SDRAM
- Storage – 16GB eMMC 5.0 flash, internal SATA port for 2.5″ & 3.5″ hard drives / SSDs, micro SD slot
- Video Output – HDMI 2.0a port up to 4K60 with HDR10 support, HDCP 1.4/2.2, AV port (composite + stereo audio)
- Audio Output – Via HDMI, AV ports, optical S/PDIF port
- Video Decoding – 10-bit H.265/HEVC up to 160 Mbps, H.264, MPEG-2, AVS/AVS+, VC1, VP8/VP9
- Connectivity – Gigabit Ethernet, dual band 802.11 b/g/n/ac WiFi, Bluetooth 4.0 LE
- USB – 1x USB 3.0 port, 3x USB 2.0 ports
- Tuner
- Smart Card slot
- 4 Options
- Combo tuner with DVB-S2/S and DVB-T2/T/C tuners
- Dual DVB-T2/T/C tuner with two demodulators
- Twin DVB-S2/S tuner with Disqc v1.0, v1.2, and USALS support
- Dual ATSC 2.0 tuner with two demodulators
- Misc – Power/standby button, power switch, 2x LED, 4-digit 7 segment front panel display, IR receiver
- Power Supply – 12V/3A ; Standby mode power consumption: 0.5 watt
- Dimensions – 320 x 275 x 135 mm
- Weight – 1.5 kg
- Operating Temperature – 0 to 45 °C
The box runs Android 5.1.1 Lollipop with LeanBack launcher, a customized Live TV app, and support for PVR, time-shifting, and TVHeadEnd 3.6 to steam Live TV to other devices (laptop, smartphone…). You’ll find more details hardware and software specifications in U5 PVR forums.
U5 PVR Deluxe Unboxing
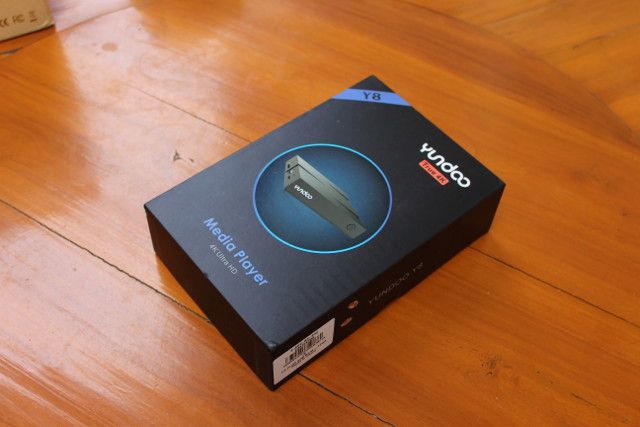
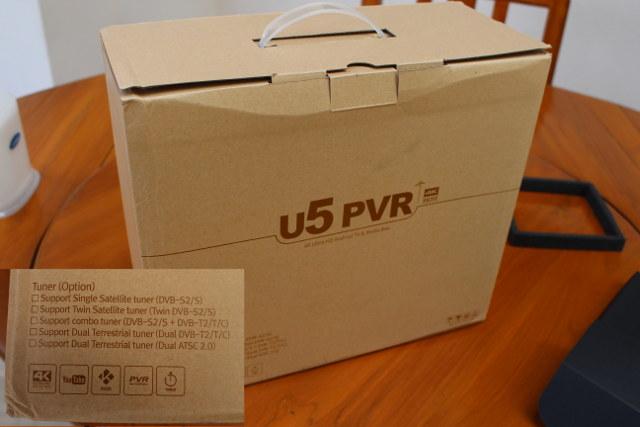
The device package is really massive compared to other boxes I’ve received. I thought somebody might have sent an large oscilloscope instead…
![]()
Click to Enlarge
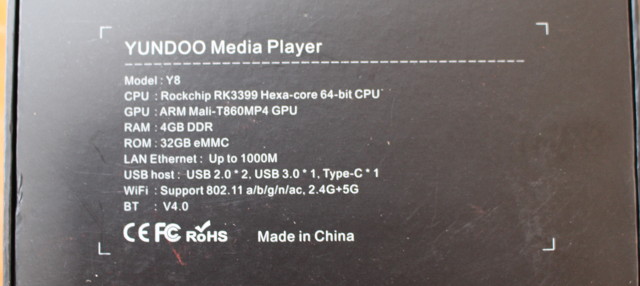
The package also shows one more option for tuner: single satellite tuner (DVB-S2/S). No tick on my package, so we’ll see which exact model I’ve received later.
![]()
Click to Enlarge
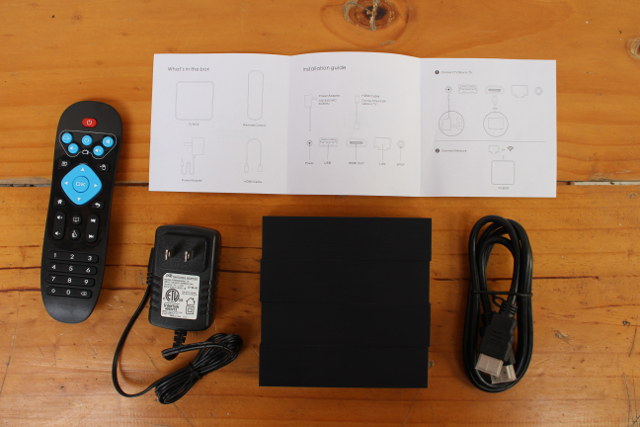
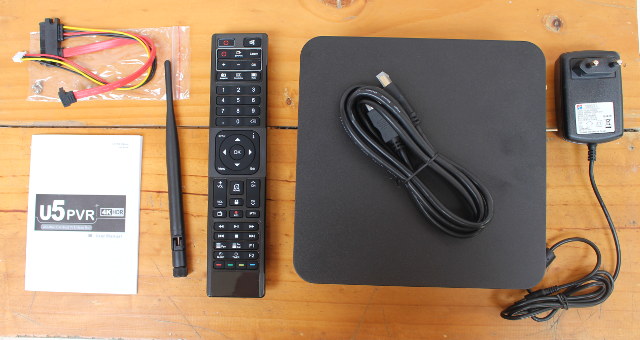
The box ships with a WiFi antenna, a large remote control taking two AAA batteries, and HDMI cable, a SATA cable + screws, a 12V/3A power supoply, and U5 PVR user manual. The user manual indicates that I should have gotten an RS-232 cable too, but it was nowhere to be found.
![]()
Click to Enlarge
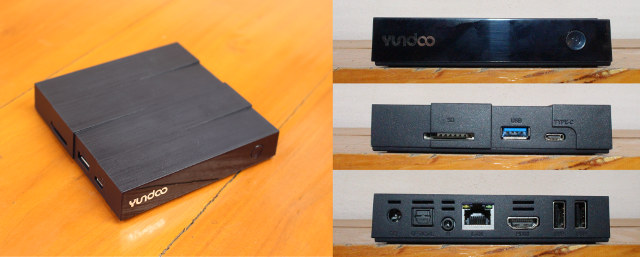
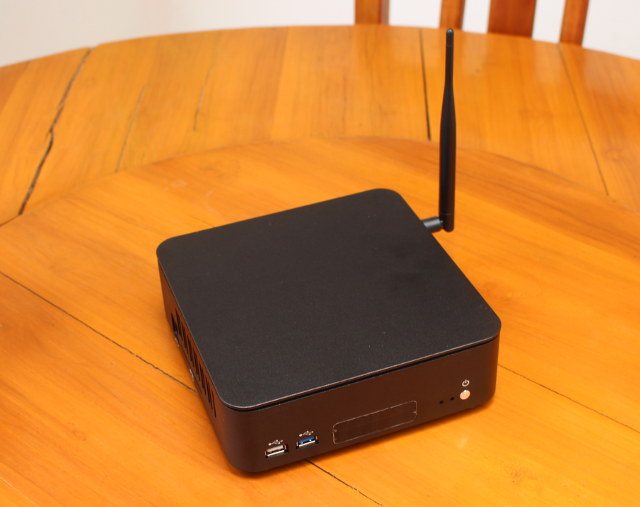
![]() The front panel comes with one USB 2.0 port, one USB 3.0 port, a window for the IR receiver and LCD display, two LEDs and the power button.
The front panel comes with one USB 2.0 port, one USB 3.0 port, a window for the IR receiver and LCD display, two LEDs and the power button.
![]()
![]()
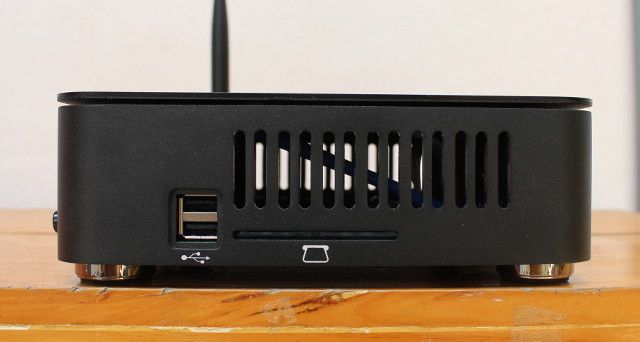
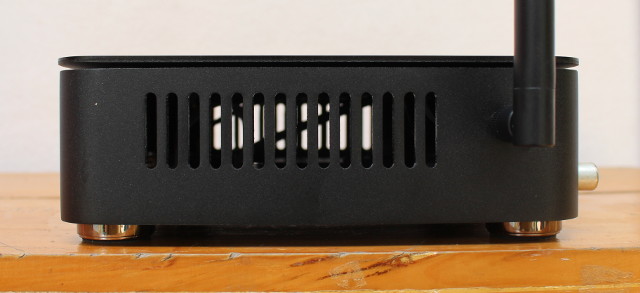
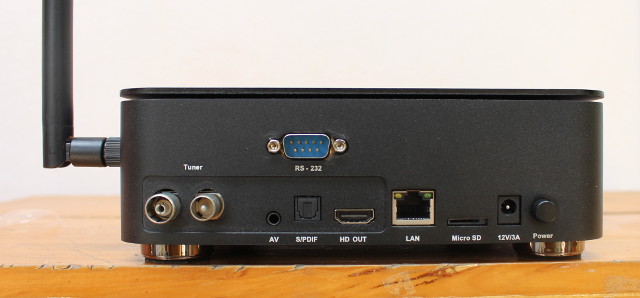
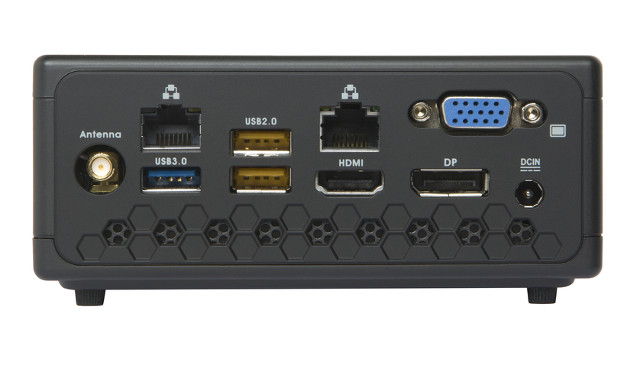
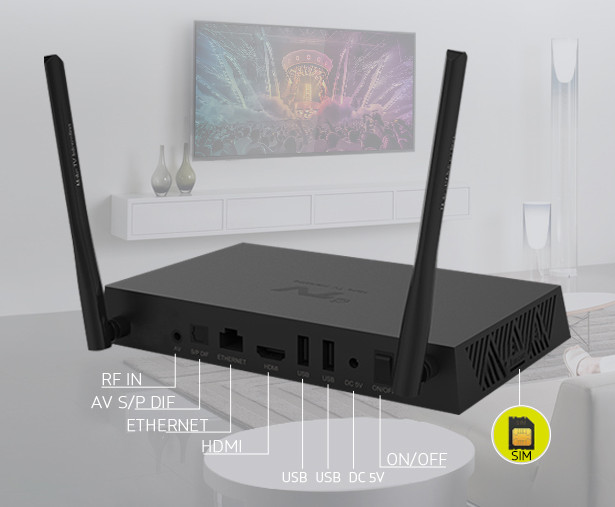
Both sides of the set-top box expose plenty of ventilation holes, with one side featuring the WiFi antenna connector, and the other two more USB 2.0 ports, and the Smart Card slot. ![]() The rear panles comes with two coaxial connectors (one female, one male) for the tuner, a 3.5mm AV jack, optical S/PDIF, HDMI 2.0a, Gigabit Ethernet, micro SD slot, the power jack, a mechanical power switch, and an RS-232 port used to reflash or upgrade the firmware.
The rear panles comes with two coaxial connectors (one female, one male) for the tuner, a 3.5mm AV jack, optical S/PDIF, HDMI 2.0a, Gigabit Ethernet, micro SD slot, the power jack, a mechanical power switch, and an RS-232 port used to reflash or upgrade the firmware.
U5 PVR Deluxe Teardown and SATA Drive Installation
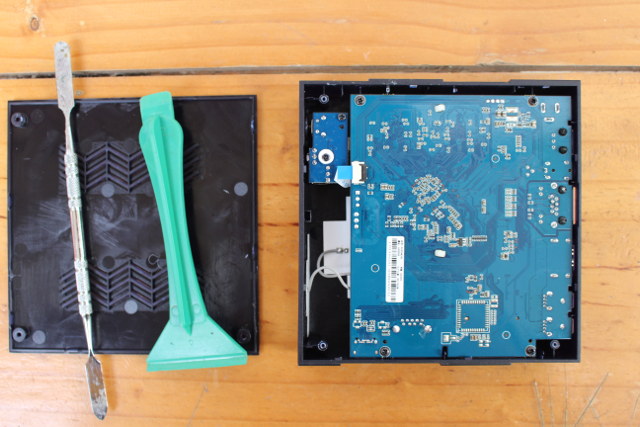
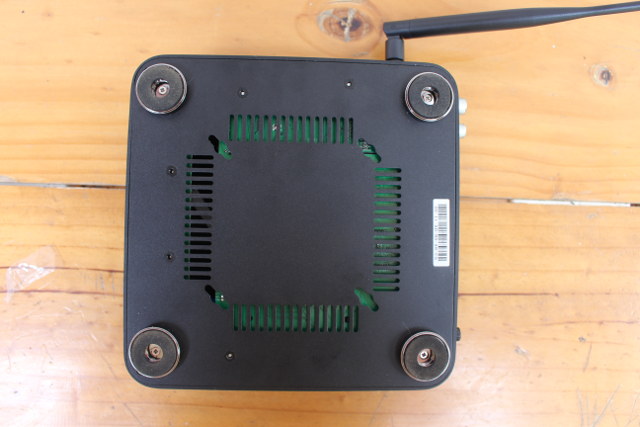
Most TV boxes need to be opened from the bottom side of the case, and there are indeed a few screws that we could have removed to try to open the box. But since U5 PVR is supposed to take an internal hard drive, I found it would be an inconvenient way.
![]()
Click to Enlarge
So I looked into the user manual, but found absolutely nothing about installing a hard drive in the box. Then I realized the top cover was slightly elevated, and after gently pulling it I managed to take it out fairly easily.
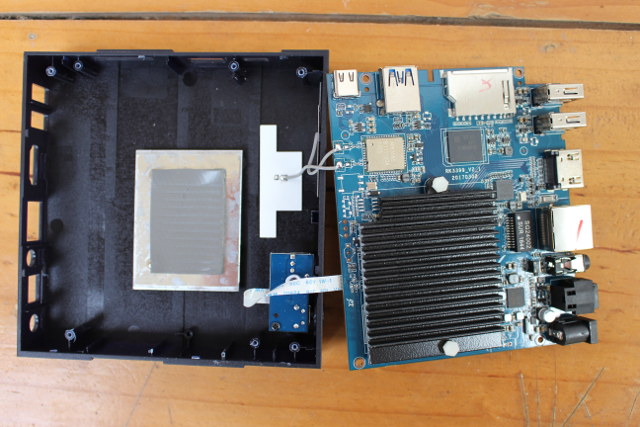
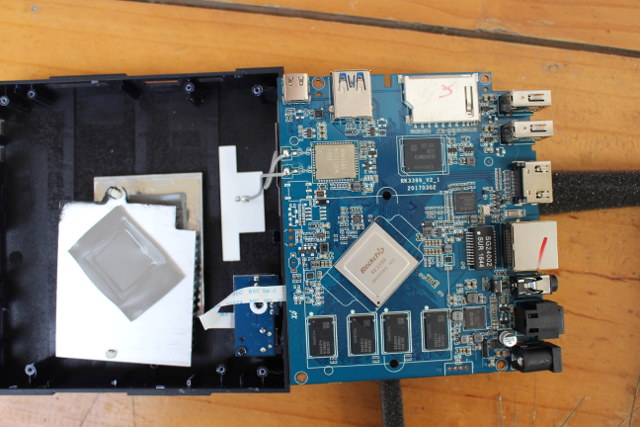
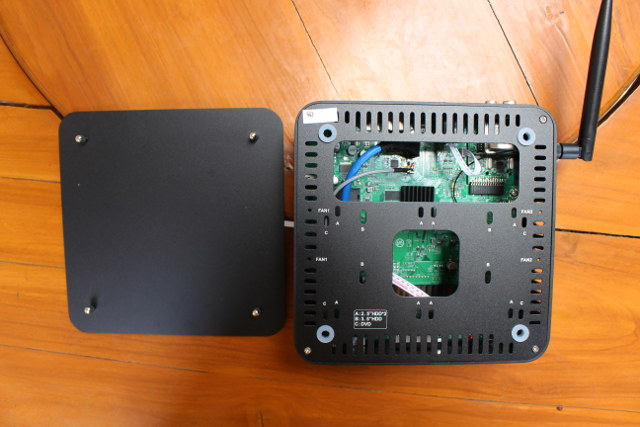
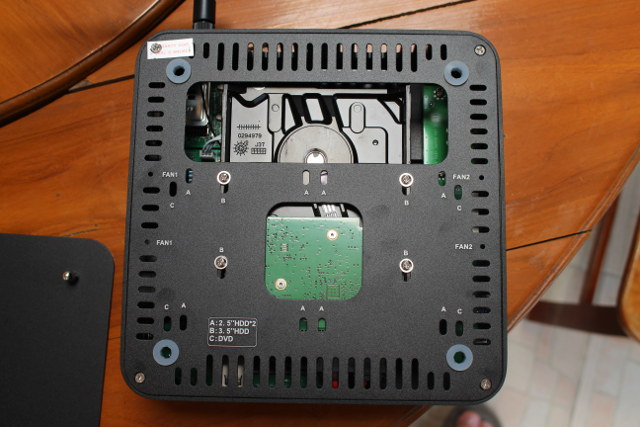
![]() We can see multiple mounting options with A: 2x 2.5″ HDD, B: 1x 3.5″ HDD, and C: 1x DVD. There’s only one SATA port, so I’m not sure how you would install two SATA drives, and a DVD drive would be possibly, but inconvenient unless you have a specific application that requires one DVD, or you place it on top of the case, and do not put the top cover back. There are also holes to install a fan, but I don’t have details to what type of fan is suitable. The sticker on the top left of the case read “Warranty void if seal is broken”, which does not make any sense, since that means connecting the hard drive internally would void the warranty. Anyway, I loosen the four screws, and pulled out the cover to have a better look at the board.
We can see multiple mounting options with A: 2x 2.5″ HDD, B: 1x 3.5″ HDD, and C: 1x DVD. There’s only one SATA port, so I’m not sure how you would install two SATA drives, and a DVD drive would be possibly, but inconvenient unless you have a specific application that requires one DVD, or you place it on top of the case, and do not put the top cover back. There are also holes to install a fan, but I don’t have details to what type of fan is suitable. The sticker on the top left of the case read “Warranty void if seal is broken”, which does not make any sense, since that means connecting the hard drive internally would void the warranty. Anyway, I loosen the four screws, and pulled out the cover to have a better look at the board.
![]()
Click to Enlarge
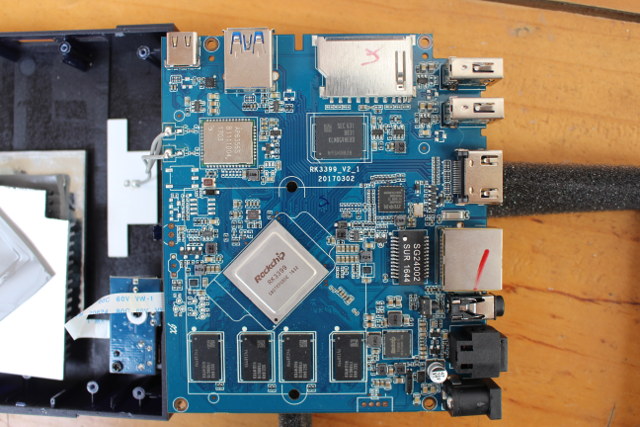
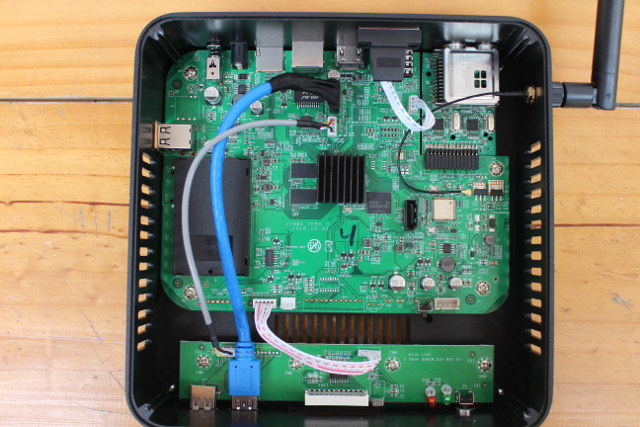
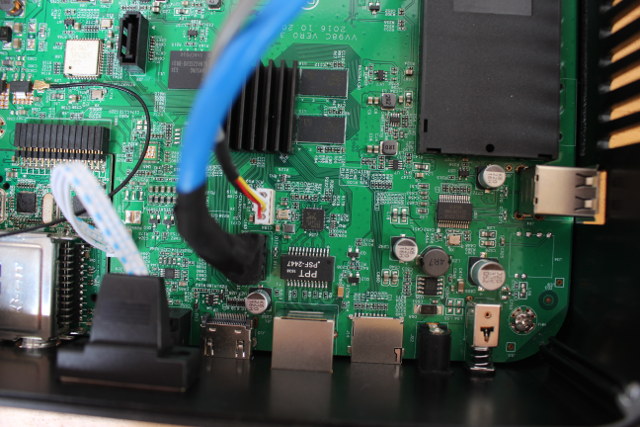
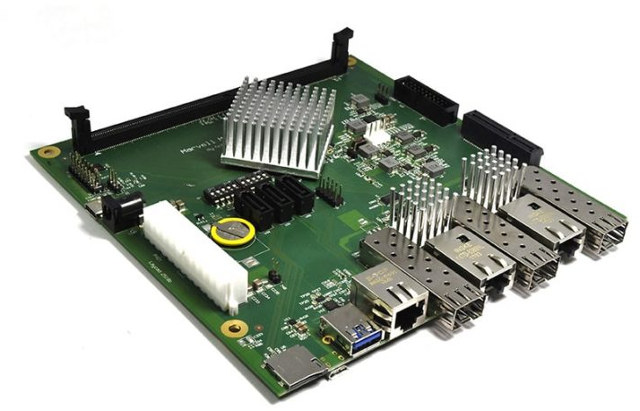
The board is called “VV98C VERO 3”. A small heatsink covers the Hisilicon processor, are very next to it we can see a 16GB Samsung KLMAG2GEND-B031 eMMC 5.0 flash with 230/50MB/s sequential R/W speeds, and 6.5K/6K R/W IOPS, as well as two K4A8G16-5WG8CRC DDR4 memory chips. The tuner board comes with two Availink AVL6762TA DVB-T2/T/C demodulators, which means I got the Dual DVB-T2/T/C tuner version of U5 PVR Deluxe. Ampak AP6335 module provides 802.11 b/g/n/ac and Bluetooth 4.0 Smart connectivity, while as we can see in the picture below, Realtek RTL8211E transceiver and PSF-2447 transformer are used for Gigabit Ethernet.
![]()
Click to Enlarge
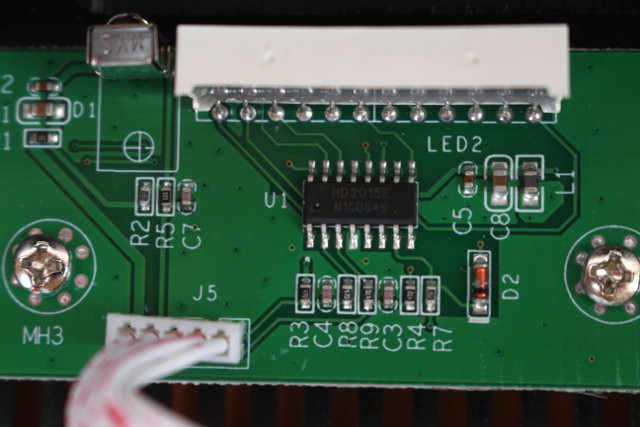
Genesys Logic GL850G USB 2.0 hub is used for the extra USB ports since the processor only comes with a single USB 2.0 interface. The tiny 8-pin chip close to the power jack is FR9889 step-down DC to DC converter. The front panel board includes i-core HD2015E LED driver IC.![]()
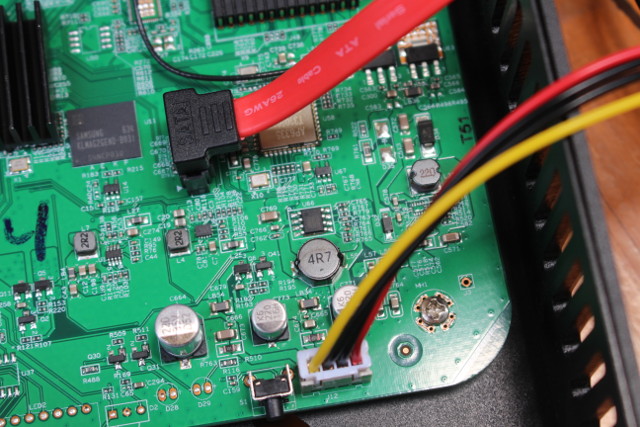
Now that we’ve had a look at the board’s main components. Let’s carry with the hard drive installation, and I’ll use a 3.5″ hard drive. First connect the 4-wire part of the cable J12 header, and the red SATA cable to the SATA port close to Ampak AP6335 module.
![]() Connect the other part of the cable to the hard drive, place the HDD upside-down on a table, and tighten the four screws through the four “B” holes, before placing it back on top of the case as shown below.
Connect the other part of the cable to the hard drive, place the HDD upside-down on a table, and tighten the four screws through the four “B” holes, before placing it back on top of the case as shown below.
![]()
Click to Enlarge
Tighten the four screws on the edges of the box, put back the top cover, and you’re done. In case, you prefer to use a fan, I strongly suspect that J14 3-pin header on the main board is designed for this very purpose.
I’d like to thank Shenzhen Vivant Technology for sending a review sample. Distributors and resellers may contact the company to purchase in quantities. U5 PVR Deluxe is not for sale at the retail level yet, but you should eventually find it on Vivant Technology Aliexpress store.
Tweet Last year, I reviewed U4 Quad Hybrid, an Android TV box powered by Hisilicon Hi3796M quad core Cortex A7 processor and with a combo DVB-T2/C + DVB-S2 tuner. with…
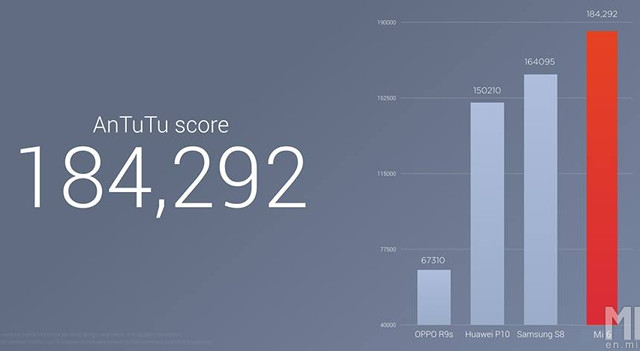
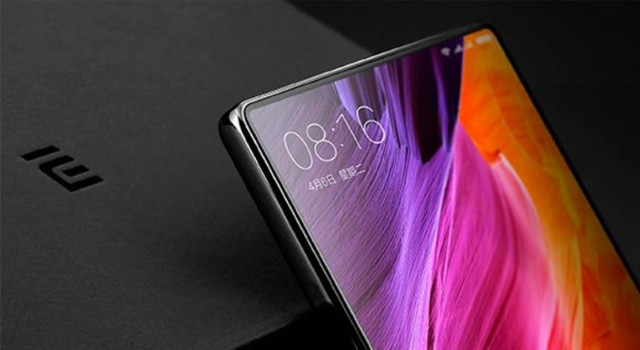
 Xiaomi Mi 6 specifications: