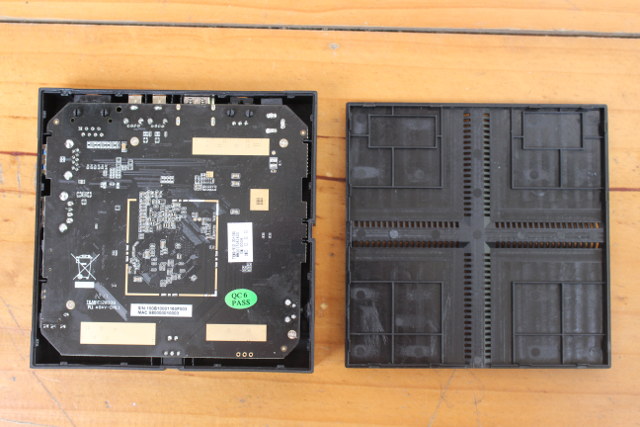
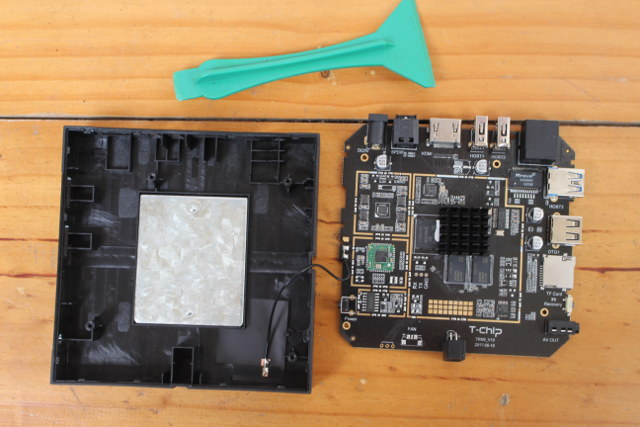
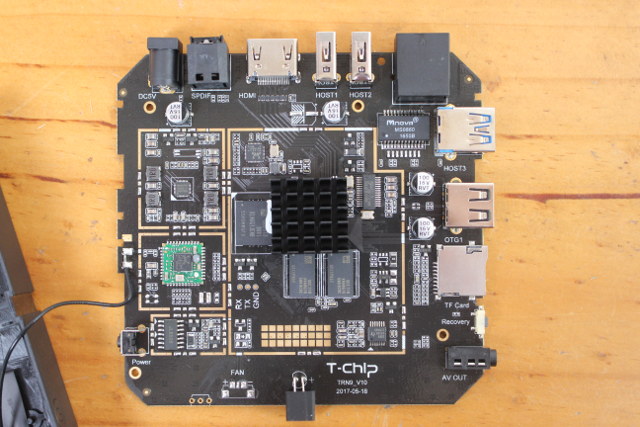
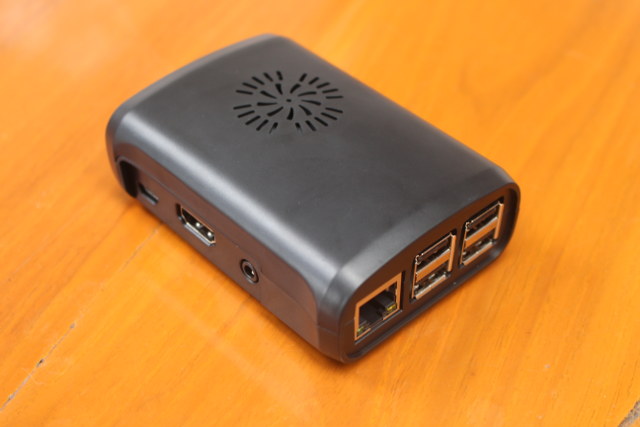
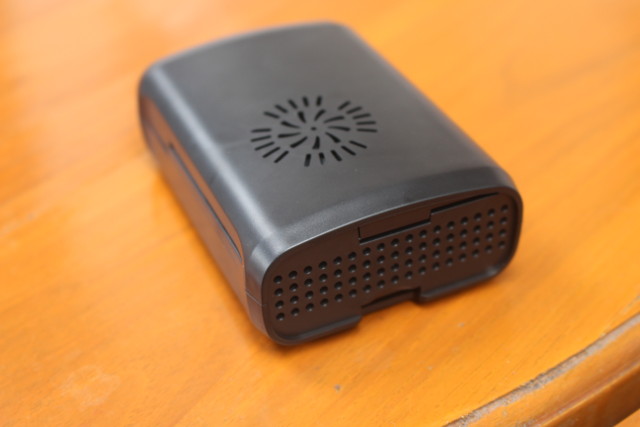
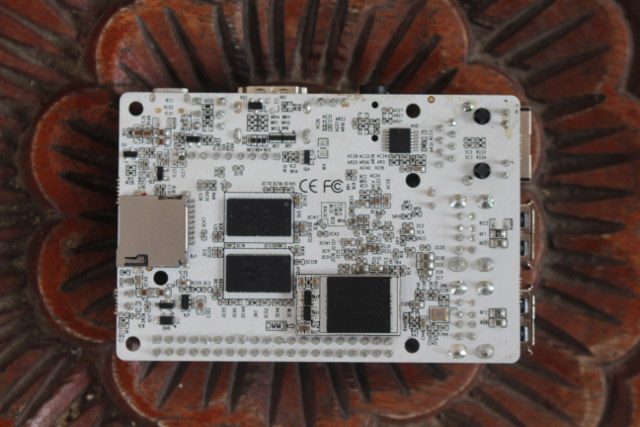
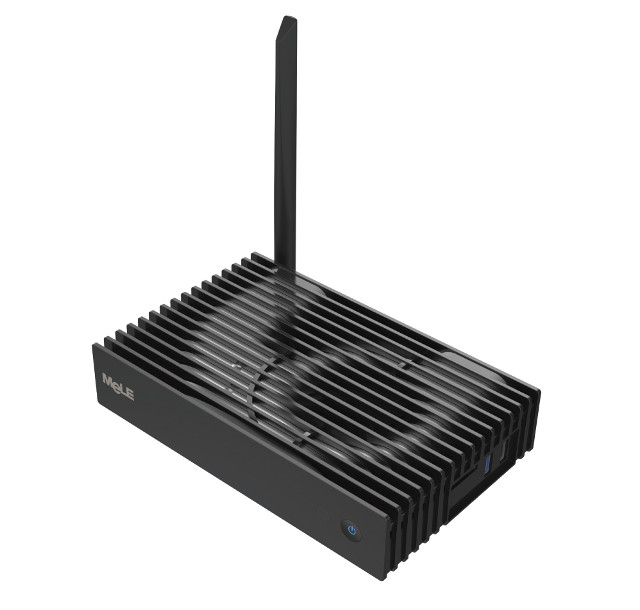
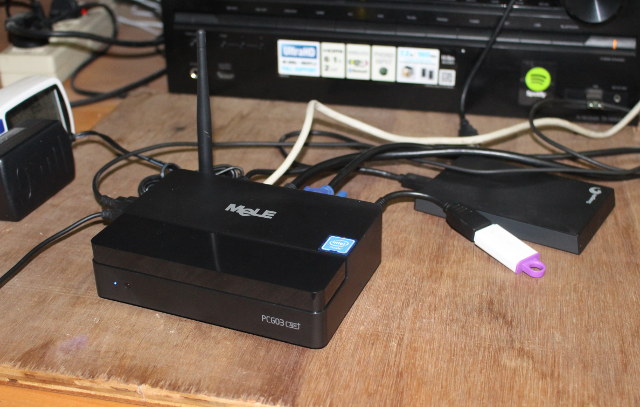
MeLE PCG03 Apo is an update to MeLE PCG03 mini PC, and one of the rare Apollo Lake mini PCs to be both fanless, and support HDMI 2.0 output. I’ve already checked out the hardware design in “MeLE PCG03 Apo Fanless Apollo Lake mini PC Review – Part 1: Unboxing and Teardown“, so in the second part of the review I tested Windows 10, focusing on HDMI 2.0 features, audio pass-through in Kodi, and performance and stability tests to see how well it compared to similar actively cooled mini PCs such as Voyo V1 VMac mini.
MeLE PCG03 Apo Setup and System Information
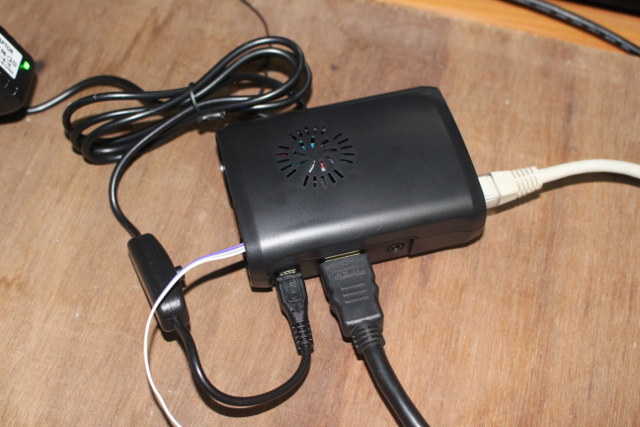
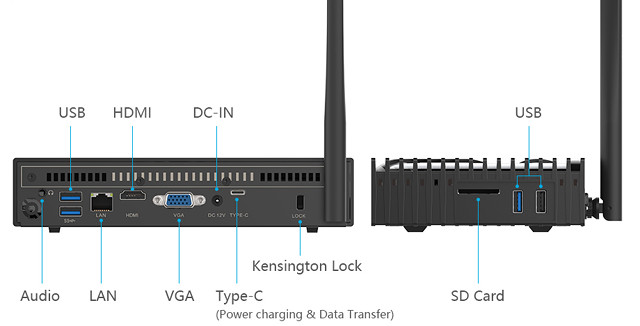
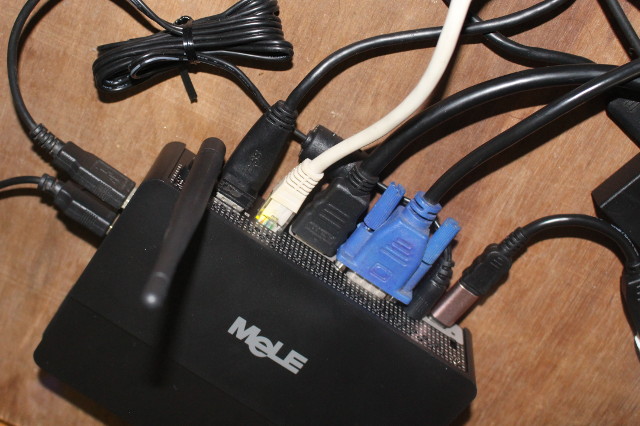
I connected a USB 3.0 drive to one of the USB 3.0 ports, USB keyboard and mouse, and RF dongle for a wireless gamepad to the other USB 2.0/3.0 ports, as well as USB type C to micro USB adapter itself connected to a micro USB OTG adapter in order to add a USB flash drive. Finally I added Ethernet, VGA and HDMI cables, and of course the power supply to complete the setup.
Click to Enlarge
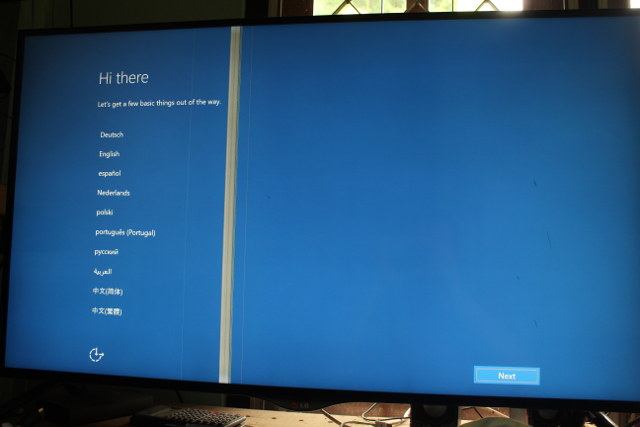
A typical boot to the login window takes around 15 seconds, but the very first boot, I went through the usual Windows 10 setup wizard to select the language, create a user, etc…, as well as retrieve the latest Windows update. So that’s better than some other Windows 10 mini PCs which are already configured with a default user, and may raise suspicions.
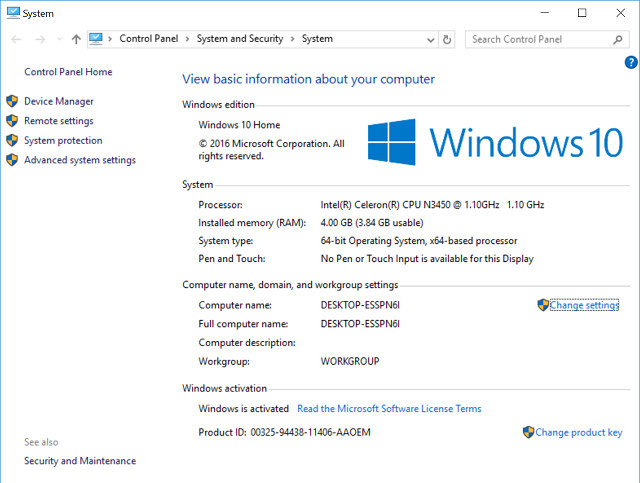
I still wen to Control Panel->System and Security->System to check Windows 10 is indeed activated, and the mini PC is running Windows 10 Home 64-bit on an Intel Celeron N3450 with 4GB RAM as expected.
Click to Enlarge
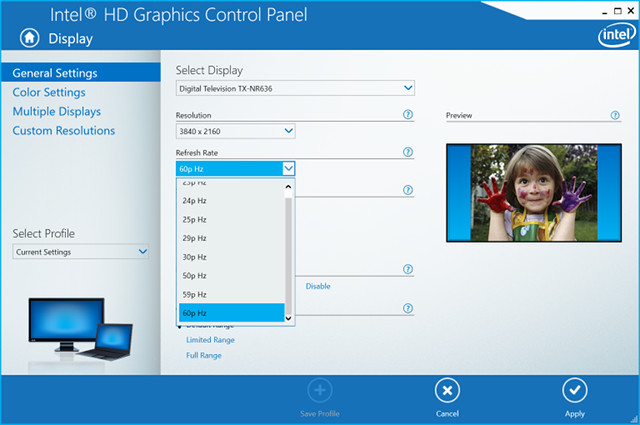
The next step was to check HDMI 2.0 support that should allow 4K resolutions @ 60 Hz, and I could select and use 3840×2160 or 4096×2160 up to “60p Hz” without any issues.
Click to Enlarge
Since we have a VGA port too, I tested dual display setup using extended desktop mode with 3840×2160 resolution @ 60 Hz on my 4K TV, and 1600×1050 on my Full HD TV, as it was the maximum resolution I was offered.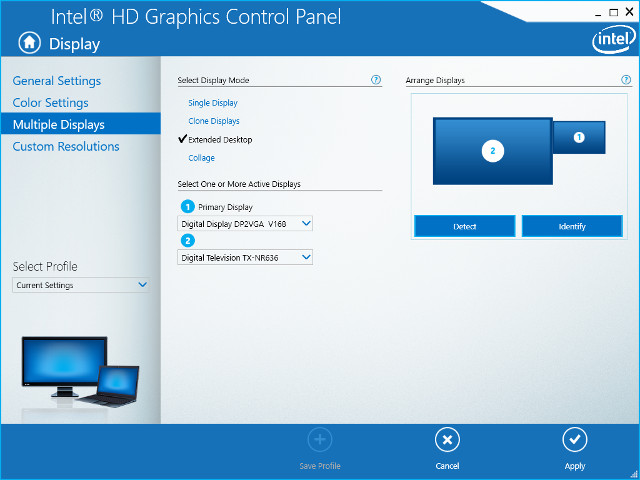
No problem here again, and I could use to independent display one connected via HDMI 2.0, and the other via VGA.
Click to Enlarge
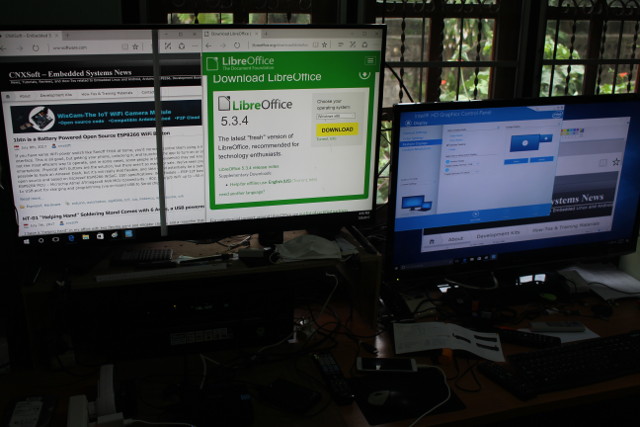
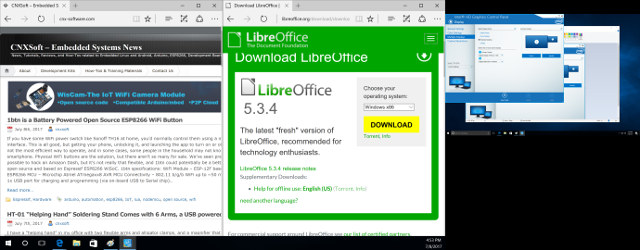
I’ve also included a screenshot of the dual display setup for those interested.
Click for Original Size
I took the screenshot below after starting to download a few programs (but no installation), and 28.9GB storage is really tight for Windows 10, I could not install all programs used for the review, without uninstalling one or more. For example, if I install PCMark 8, complete the benchmark, I had to remove it before install PCMark 10, even when moving all download the USB partitions.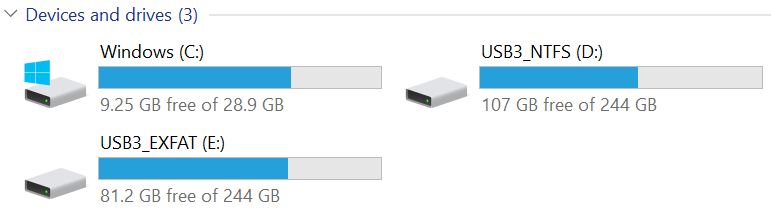
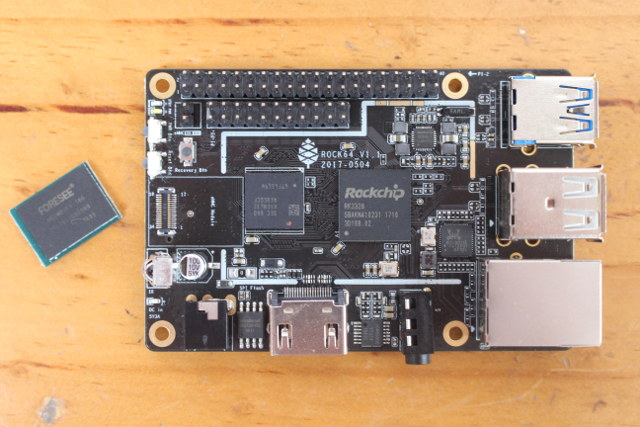
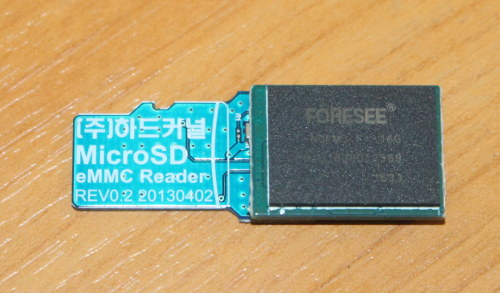
So may want to run Disk Cleanup from time to time, and uninstall some pre-installed games. I may also consider disabling hiberfil.sys file, learn how to do folder redirection and filesystem junction with mklink, which I used for Package Cache directory. You could do this to external USB hard drive, but performance may suffer while loading programs or during databases accesses, so you could consider adding a 80mm M.2 SSD inside the mini PC. I could not get one to test, but the company told me they tested three models available on Aliexpress:
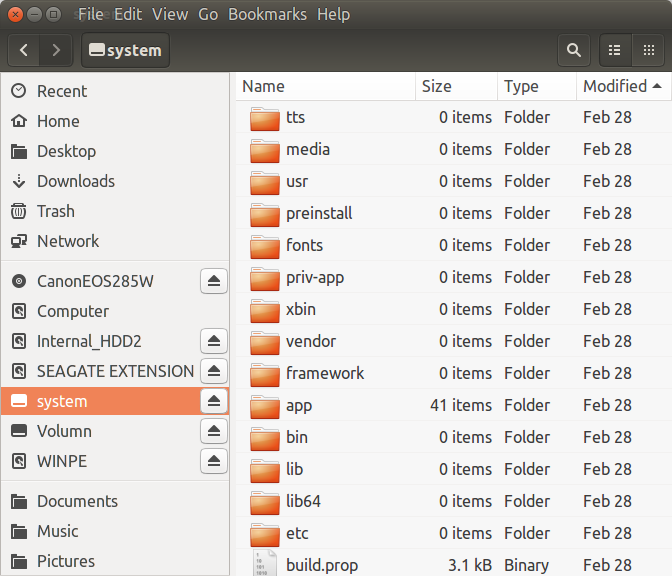
Another thing I discovered is that when you “uninstall” Windows Store apps, there are not deleted, but for some reasons kept in C:Programs FilesWindowsAppsDeleted directory, so I’d have to take ownership of the directory and delete it if you want to free up some more space.
The 32GB eMMC flash capacity is the most negative point I found about this mini PC, I wished the company could offer a 64GB version, or better a pre-installed 128 M.2 SSD. This will not be a problem if you only plan to use the box as an HTPC, but for desktop use, you really need more external storage.
The mini PC recognized the NTFS and exFAT partition in my USB 3.0 drive, but the USB flash drive which I connected the USB type C port was not found. I tried to connect the keyboard there instead, and then to my computer via a USB type C to USB type A cable, but again no luck in both cases. It looks like the USB C port is not usable for anything. Maybe my sample has some issues.
I took a screenshot of the Device Manager for people who want a few more technical details about peripherals.
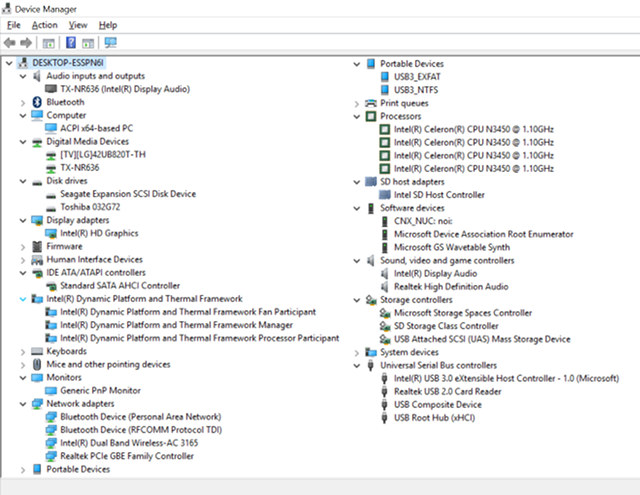
Click to Enlarge
… as well as HWiNFO64 which basically reports the same info as on Voyo V1 Vmac Mini since it’s based on the same Celeron N3450 processor.
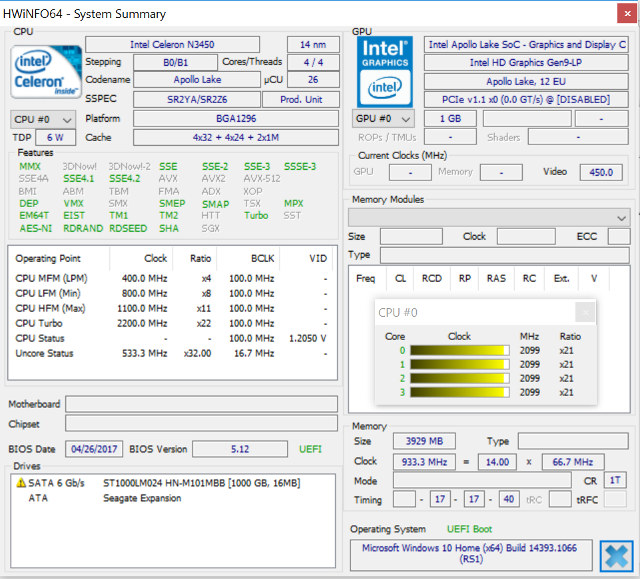
Click to Enlarge
MeLE PCG03 Apo Benchmarks
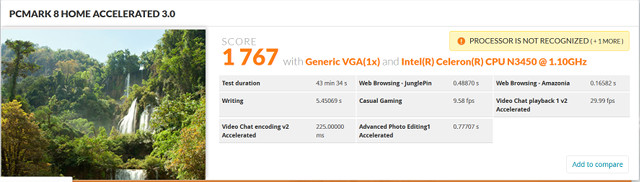
Let’s start with PCMARK 8 HOME ACCELERATED 3.0 benchmark at 1080p60 resolution and framerate.
Click to Enlarge
The score here is surprisingly higher than on the fan cooled Voyo mini PC (1,566 points), and not too far to the score I got (1,846)with the Pentium N4200 version of Voyo V1 VMac Mini.
Since PCG03 Apo is a candidate to use as 4K desktop for simple tasks, I run the same benchmark using 3840×2160 @ 60p Hz video output, and the score dropped a little to 1,431 points.

Click to Enlarge
Please note that only two passes out of three could complete, as the benchmark failed somewhere during the third pass, but the average should not change, it’s just we can 2 test samples, instead of 3. I tried the benchmarks 3 times in total, and the two other times it failed during the first pass ending with no score. You can find the details results here.
FutureMark has recently released PCMark 10, so for future reference I also ran that version of the benchmark using 1080p60 output.

Click to Enlarge
Check this link for full results. All other benchmarks below were done using 1920×1080 @ 60 Hz video output / resolution.
Passmark PerformanceTest 9.0 confirmed the good performance of the device with 995.70 points, which compares to 998.4 points for Voyo V1 (N3450), and 1087 points for Voyo V1 (N4200).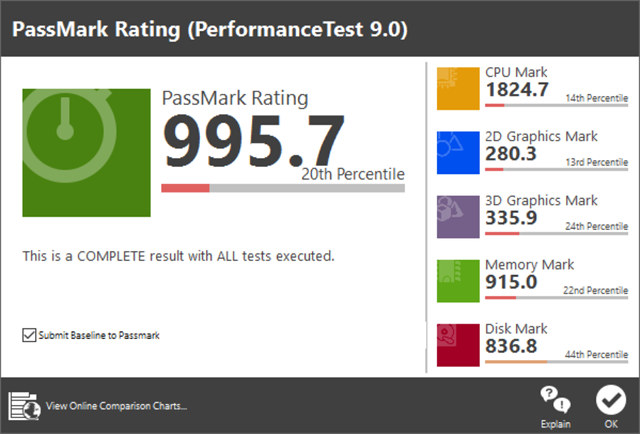
Note the performance of Disk Mark is quite weaker here, and the Voyo models who got close to 3,000 points, but the latter had the C: drive in a 128GB SSD, instead of a 32GB flash, which explains the massive performance difference here.
I ran three 3DMark tests showing performance that’s almost as good as Voyo mini PC based on Pentium N4200 processor.

Click to Enlarge
Details for all three results can be found below:
CrystalDiskMark reports up to 258 MB/s sequential read speed, and 51 MB/s write speed, with random I/O up to 28 MB/s for the C: drive (32GB eMMC flash). That’s actually roughly the same as the 32GB eMMC flash in Voyo mini PC, but a big difference compared to the 500MB/s+, you got from the 128GB FORESEE SSD installed in the same devices.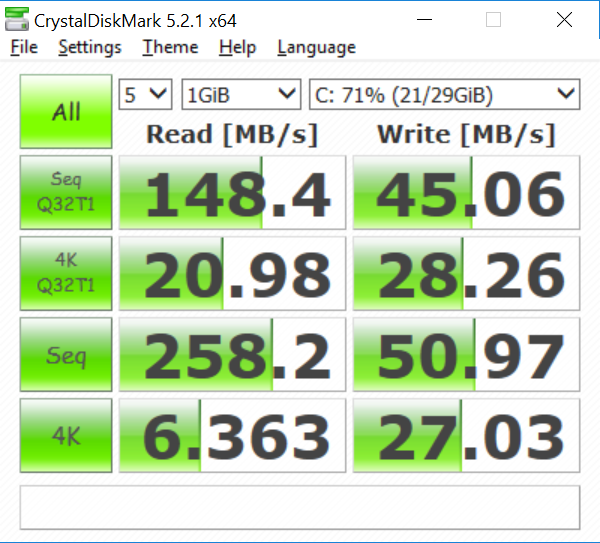
Random I/O performance will be better in the SSD too, so you may considering re-installing Windows 10 in an M.2 SSD if you decide to purchase one. You’ll find BIOS, drivers, and instructions to re-install Windows 10 in MeLE’s forums.
USB 3.0 performance is fine with my USB driver achieving around 100MB/s read and write sequential speed.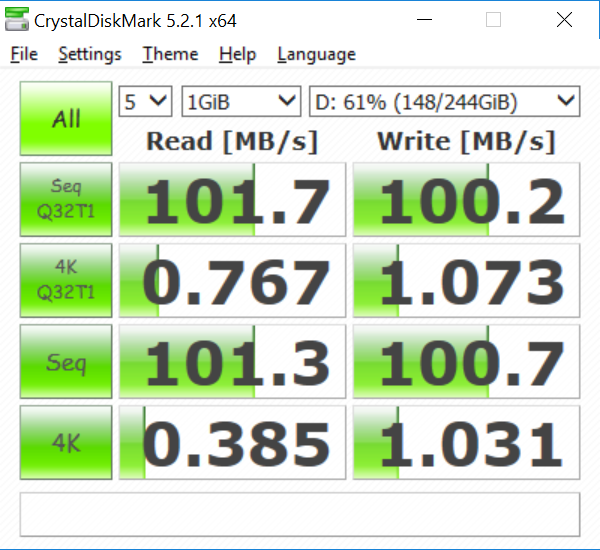 The random I/Os number shows why you don’t want to install Windows or apps in such drive.
I used iperf 2.x to measure network performance with using dual duplex transfer over Gigabit Ethernet:
|
1 2 3 4 5 6 7 |
Client connecting to 192.168.0.113, TCP port 5001 TCP window size: 196 KByte (default) –––––––––––––––––––––––––––––– [ 6] local 192.168.0.104 port 53610 connected with 192.168.0.113 port 5001 [ ID] Interval Transfer Bandwidth [ 6] 0.0-60.0 sec 6.04 GBytes 865 Mbits/sec [ 4] 0.0-60.0 sec 5.84 GBytes 836 Mbits/sec |
All good, so I connected the mini PC to my AC router…

… and performed WiFi upload and download tests with iperf:
- Upload
[ 5] local 192.168.0.104 port 5001 connected with 192.168.0.105 port 51921
[ 5] 0.0-60.0 sec 1.40 GBytes 201 Mbits/sec
- Download
[ 3] local 192.168.0.104 port 36240 connected with 192.168.0.105 port 5001
[ ID] Interval Transfer Bandwidth
[ 3] 0.0-60.0 sec 1.92 GBytes 275 Mbits/sec
Those are decent results with my setup, i.e. the AC router is located about 4 meter from the DUT and with a wall in between. You can see a comparison with some 802.11ac Android TV boxes I’ve recently reviewed.
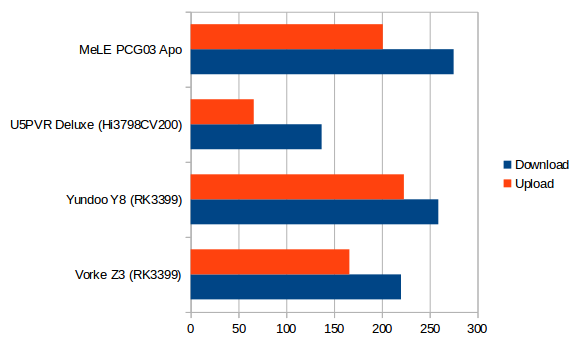
802.11ac WiFi Download and Upload Speed in Mbps
To give a better idea of the performance I compare it against other low power mini PCs based on Braswell (MINIX NGC-1, Vorke V1), Cherry Trail (Voyo V3, MINIX NEO Z83-4), Apollo Lake (Voyo V1 VMac Mini), and Skylake (Compute Stick) for various benchmarks.
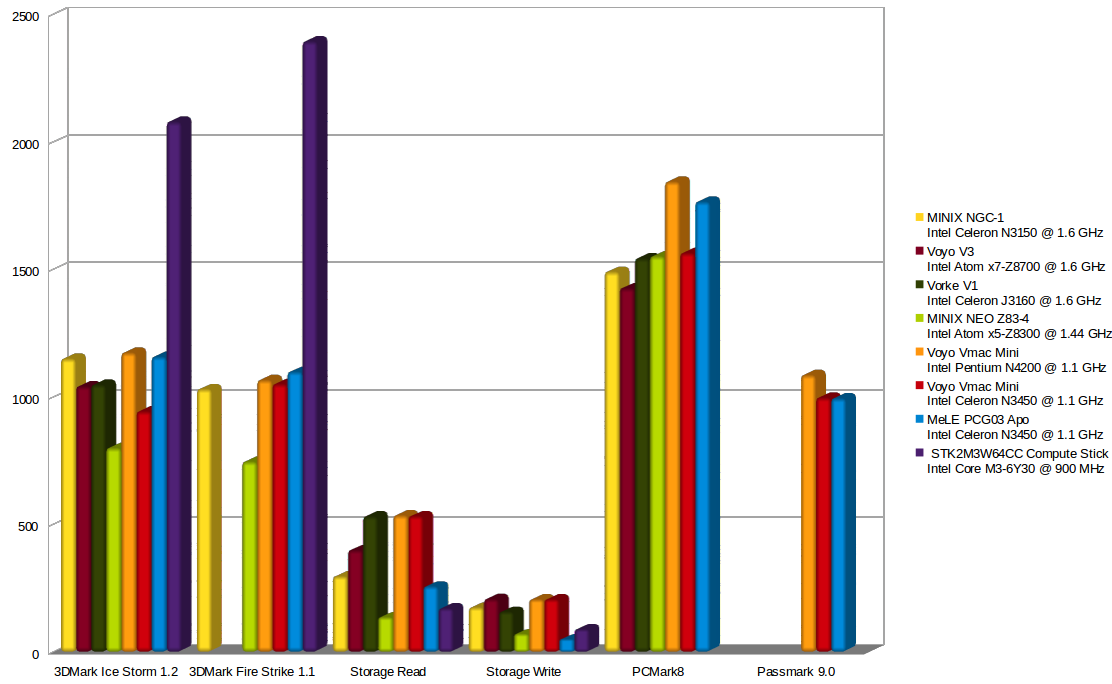
Click to Enlarge
Note: Ice Storm scores divided by 10, Fire Strike scores multiplies by 4 for scale.
The Skylake compute stick really stands out despite having similar TDP, but it’s also much more expensive. Other mini PCs are closely matched, but the good news is the MeLE PCG03 Apo mini PC fairs well in all benchmarks, except for storage speeds, but it can be made to match other systems if you use a M.2 SSD to run Windows instead of the 32GB eMMC flash.
Kodi 4K Video Playback and HDMI Audio Pass-through
I’ve installed the latest Kodi 17.3, and run it using 1920×[email protected] output.
Click to Enlarge
You don’t need to set the Windows resolution to 3840×2160 to watch videos, since Kodi will automatically do that if you go to Settings->Player Settings->Videos, and set Adjust display refresh rate to On start / stop, as it will also automatically adjust to the best resolution for the video.
Once I’d done that I tested my usual 4K video samples via SAMBA over Gigabit Ethernet unless otherwise stated:
- HD.Club-4K-Chimei-inn-60mbps.mp4 – Mostly OK, but the video seems to skip frames a few times
- sintel-2010-4k.mkv – OK
- Beauty_3840x2160_120fps_420_8bit_HEVC_MP4.mp4 (H.265) – OK
- Bosphorus_3840x2160_120fps_420_8bit_HEVC_MP4.mp4 (H.265) – OK
- Jockey_3840x2160_120fps_420_8bit_HEVC_TS.ts (H.265) – OK
- MHD_2013_2160p_ShowReel_R_9000f_24fps_RMN_QP23_10b.mkv (10-bit HEVC, 24 fps) – OK
- phfx_4KHD_VP9TestFootage.webm (VP9) – 4 to 6 fps (Software decode)
- BT.2020.20140602.ts (Rec.2020 compliant video) – SAMBA: Audio cuts and buffering issue; HDD: OK
- big_buck_bunny_4k_H264_30fps.mp4 – OK
- big_buck_bunny_4k_H264_60fps.mp4 – Not super smooth, but no audio delay like on ARM TV boxes. Almost watchable
- Fifa_WorldCup2014_Uruguay-Colombia_4K-x265.mp4 (4K, H.265, 60 fps) – OK
- Samsung_UHD_Dubai_10-bit_HEVC_51.4Mbps.ts (10-bit HEVC / MPEG-4 AAC) – OK
- Astra-11479_V_22000-Canal+ UHD Demo 42.6 Mbps bitrate.ts (10-bit H.265 from DVB-S2 stream) – OK
- 暗流涌动-4K.mp4 (10-bit H.264; 120 Mbps) – Maybe 10 fps (Software decode) and buffering issues
- Ducks Take Off [2160p a 243 Mbps].mkv (4K H.264 @ 29.97 fps; 243 Mbps; no audio) – HDD: OK
- tara-no9-vp9.webm (4K VP9 YouTube video @ 60 fps, Vorbis audio) – 4 to 6 fps (Software decode) + buffering issues
- The.Curvature.of.Earth.4K.60FPS-YT-UceRgEyfSsc.VP9.3840×2160.OPUS.160K.webm (4K VP9 @ 60 fps + opus audio) – 4 to 6 fps (Software decode) + buffering issues
Automatic frame rate switching is working well, but playing videos with bitrate over 50Mbps over SAMBA seems to be an issue with this mini PC. VP9 and 10-bit H.264 codecs are not supported by Apollo Lake processor, so Kodi revert to software decoding, but the processor is not powerful enough to handle those codecs at 4K. Hi10p up to 1080p is fine. One small issue worth noting is that almost all videos had a short audio cut after 16 to 19 seconds, but the problem would not reoccur at other points in the videos.
Apollo Lake mini PC are supposed to support audio pass-through, but HDMI 2.0 is implemented via an eDP to HDMI bridge which in the past has created issue with this features. So I enabled audio pass-through in Kodi by going to Settings->System Settings->Audio, enabling Allow passthrough, and selecting DIRECTSOUND: TX-NR636…. as the Passthrough output device before running the tests with various audio codecs.
| Video | HDMI Pass-through |
| AC3 / Dolby Digital 5.1 | OK |
| E-AC-3 / Dolby Digital+ 5.1 | PCM 2.0 |
| Dolby Digital+ 7.1 | PCM 2.0 |
| TrueHD 5.1 | PCM 2.0 |
| TrueHD 7.1 | PCM 2.0 |
| Dolby Atmos 7.1 | PCM 2.0 |
| DTS HD Master | PCM 2.0 |
| DTS HD High Resolution | PCM 2.0 |
| DTS:X | PCM 2.0 |
So only AC3 is supported. I changed to WASAPI output device instead, and the results are not much better.
| Video | HDMI Pass-through |
| AC3 / Dolby Digital 5.1 | OK |
| E-AC-3 / Dolby Digital+ 5.1 | OK |
| Dolby Digital+ 7.1 | PCM 2.0 |
| TrueHD 5.1 | PCM 2.0 |
| TrueHD 7.1 | PCM 2.0 |
| Dolby Atmos 7.1 | PCM 2.0 |
| DTS HD Master | PCM 2.0 |
| DTS HD High Resolution | PCM 2.0 |
| DTS:X | PCM 2.0 |
Disappointing, as HDMI 1.4 Apollo Lake mini PCs can normally handle DTS 5.1 as well even with DTS HD files.
User Experience, Stress Test, and Power Consumption
I did a user experience test like with other Windows 10 PCs with multi-tasking by launching an using ThunderBird, Firefox, Libre Office, and Gimp at the same, multi-tab browsing in Firefox playing some Flash games, and watching 4K YouTube videos. I also played Asphalt 8, and as shown in the section above used Kodi to watch videos. The experience felt very similar to other Apollo Lake mini PC with maybe apps not launching as fast due to the eMMC flash. I also run HWiNFO64 in sensor only mode during my tests and benchmarks, and CPU throttling was never reported by the program, so MeLE PCG03 Apo is a solid device with good thermal design.
I have not done any video this time, but if you’re new to Apollo Lake system, you may want to watch Voyo V1 Vmac Mini video below which should give you an idea of the performance.
[embedded content]
I also ran AIDA64 Extreme stability test during 2 hours with HWiNFO64 also running side by side, and the CPU temperature never went above 79 °C with the average CPU clock speed being 1.6 GHz right between the base frequency (1.1 GHz) and turbo frequency (2.2 GHz).
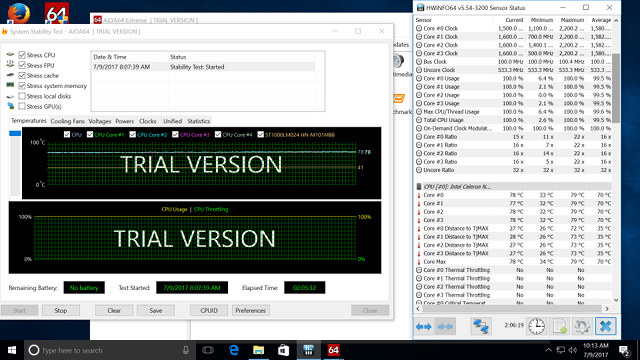
Click to Enlarge
Power consumption is about 6.4W in idle mode with the USB 3.0 drive connected, 1.0W in sleep mode, and 0.0W in power off mode.
Conclusion
MeLE PCG03 Apo is a solid device that stays cool enough under load despite thanks to a good fanless thermal design, and HDMI 2.0 works as expected with 4K @ 60 Hz supported. The VGA port also allows for dual independent display setups. Gigabit Ethernet, and 802.11ac WiFi are performing very well. The main downsides I can see are the small eMMC flash, USB type C port that would not work for anything, and HDMI audio pass-through is limited to Dolby Digital 5.1. If the first issue can easily be solved by installing a larger (and faster) 80mm M.2 SSD inside the device.
If you are interested in this mini PC, you can purchase MeLE PCG03 Apo for $159.20 including shipping on Aliexpress. If the price is higher when you check it out, it may pay to wait until the week-end to get a better price.