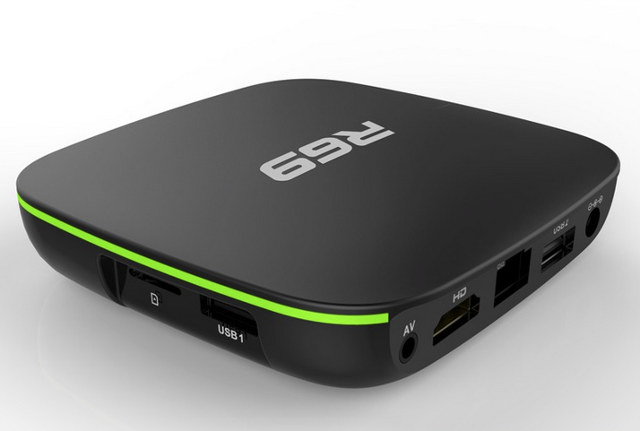
Zidoo H6 Pro is the very first Allwinner H6 based 4K TV box. The Android 7.0 device support H.265, H.264 and VP6 4K video decoding, comes with fast interfaces such as USB 3.0, and network connectivity with Gigabit Ethernet and 802.11ac WiFi.
I’ve already checkout the hardware in the first part of the review entitled “Zidoo H6 Pro (Allwinner H6) TV Box Review – Part 1: Unboxing & Teardown“, and since then, I’ve had time to play with the TV box, and report my experience with Android 7.0 in this second part of the review.
First Boot and OTA Firmware Update
I’ve connected a USB keyboard and a USB dongle with RF dongles for an air mouse and gamepad on the two USB ports, a USB 3.0 hard drive to the single USB 3.0 ports, as well as HDMI and Ethernet cables before powering up the TV box. I also added two AAA batteries to the IR/Bluetooth remote control.
![]()
Click to Enlarge
Boot to the background image takes around 20 seconds, but to reach the actual launched it normally takes around one minute and 25 seconds when I have the hard drive connected (with 4 partitions and many files). If I remove the hard drive, the full boot can complete within 23 seconds. Not that much of an issue, but it still may be something Zidoo wants to optimize.
On the very first boot, a few seconds after the launcher showed up, I also had a pop-up window informing me that Firmware v1.0.11 update was available, with a neat changelog listing the main changes including support for Netflix 1080p playback, and YouTube 2K/4K playback.
![]()
Click for Original Size
I clicked on the Update button to start downloading the new firmware…
![]() … an cliked Update again after downloading, to complete the firmware update with MD5 check and installation to the eMMC flash.
… an cliked Update again after downloading, to complete the firmware update with MD5 check and installation to the eMMC flash.
![]() The system will then reboot, and we can get access the Zidoo ZIUI launcher.
The system will then reboot, and we can get access the Zidoo ZIUI launcher.
![]()
Click to Enlarge
The launcher is identical to the one in Zidoo X7 except for two extra icons on the bottom for BT remote, and “Box RC” app, but more on that later.
![]()
Beside those two new remote apps, we’ll also notice HappyCast app used by Airplay/Miracast, and the lack of ZDMC (Zidoo’s Kodi fork), as we are told to use Kodi from Google Play instead.
Settings & Google Play
The settings section looks the same as Zidoo X7 settings, so I will only go through it quickly.
![]()
Click to Enlarge
We have four main section with Network, Display, Sound and Other. I could connect to WiFI and Ethernet with no issues, and Bluetooth worked with my smartphone and a pair of headphones. Display can be set up to a resolution / framerate of 3840×2160 @ 60 Hz, and PCM 2.0 output, HDMI & S/PDIF audio pass-through options are available. Looking at the Other section, About tab, and Android Settings about TV box reveals ZIDOO_H6 Pro is running Android 7.0 on top of Linux 3.10.65, and the firmware I tested for the review is v1.0.11, as we’ve seen from the OTA firmware update part of this review.
![]()
Click to Enlarge
Android security patch level is dated November 5, 2016. Not the most recent, and you won’t get monthly to bi-monthly security updates like in Android One phones such as Xiaomi Mi A1. The firmware is rooted by default.
Looking into storage options, I had 418MB free out of 10.22GB internal storage partition at the very beginning of the review, and NTFS and exFAT partitions of my USB hard drive could be mounted, but not the EXT-4 and BTRFS partitions.
![]()
I could install all apps I needed for review using Google Play, and I also installed Riptide GP2 game with Amazon Appstore since I got it for free there.
Remote Control – IR/Bluetooth, and Box RC Android App
One way Zidoo H6 Pro differs from most competitors is that it comes with a Bluetooth remote control. By default it works with the IR transmitter, and Bluetooth is disable, but you can enable Bluetooth by launching Bluetooth Remote app, or selecting BT Remote icon on the launcher.
![]()
Click to Enlarge
Hold the back and menu keys for a few seconds until the LED on the remote start flashing. The app will then show the Bluetooth remote is connected, and the battery level. Bluetooth does not enable air mouse function, and you’d still need to use the arrow keys to move the cursor in mouse mode, so the main advantage of Bluetooth over infrared is that it does not require line of sight. You can hide the box being the TV, or inside a furniture, and the remote would work. You do not need to point the remote control towards the TV box either, it works in any directions. I successfully tested the remote control up to a distance of 10 meters. Once I lost control of the OK and Back keys, but they came back later on after a reboot, and could not reproduce the issue.
I also tested MINIX NEO A2 Lite air mouse / keyboard / remote control, and again no problem. It’s my favorite way to control an Android TV boxes, since it works with all sort of user interfaces and most apps, excluding some games that require touch support.
Another way to control the TV box is to install Box RC Android app in your smartphone. Launch Box RC app in the TV box, and you should see the QR Code below.
![]()
It redirects to RC Box apk file. + Screenshots of smartphone app.
![]()
Click to Enlarge
After installation, you’ll be presented with the “key mode” pad. Tap on “My Device” and select ZIDOO_H6 Pro to connect to the TV box. Clicking on the icon in the top left corner will give you a few more remote modes, including “Handle model” for gaming…![]() … as well as mouse and gesture mode – both of which look like the left screenshot below -, and an Applications with a complete list of apps installed in the TV box. Simply select the app you want to launch in the TV box.
… as well as mouse and gesture mode – both of which look like the left screenshot below -, and an Applications with a complete list of apps installed in the TV box. Simply select the app you want to launch in the TV box.
![]()
Click to Enlarge
Finally, you’ll have an About section showing the version number, and checking for app updates, and a Screenshot option to remotely take screenshots. Everything worked well. I’m just not quite sure how to use the gesture mode.
Power Consumption & Temperature
Power control is just like on Zidoo X7 with a short press on the remote control power button bringing a menu to select between Power off, Standby, or Reboot. A long press will allow you to configure the behavior of the power button: Off, Standby, or Ask (default).
I measured power consumption in various mode, and here it works better than X7:
- Power off – 0.0 Watt
- Standby – 3.2 Watts
- Idle – 4.0 ~ 4.4 Watts
- Power off + USB HDD – 0.0 Watt
- Standby – 6.0 to 6.4 Watts
- Idle + USB HDD – 6.0 to 6.4 Watts
With regards to temperature, the box itself stays fairly as after playing a 2-hour video in Kodi, I measured 45 and 43ºC max measured on the top and bottom with an IR thermometer, and 47ºC on both sides after playing Beach Buggy Racing & Riptide GP2 for about 30 minutes. However, right after playing, CPU-Z reported respectively 86°C and 80°C CPU & GPU temperatures, which should be close to limit of the SoC. The ambient temperature was around 28°C, and 3D performance was contant while playing.
Some people reported that Kodi installed from Google Play is working well in the box, so I installed Kodi 17.5 from Google Play, enabled automatic frame rate switching, setup the connection to my SAMBA share over Ethernet, and started playing my 4K video samples:
- HD.Club-4K-Chimei-inn-60mbps.mp4 (H.264, 30 fps) – Not smooth, and some parts of the picture are very red
- sintel-2010-4k.mkv (H.264, 24 fps, 4096×1744) – Not perfectly smooth
- Beauty_3840x2160_120fps_420_8bit_HEVC_MP4.mp4 (H.265) – Plays fine, but woman face is more red than usual
- Bosphorus_3840x2160_120fps_420_8bit_HEVC_MP4.mp4 (H.265) – Not perfectly smooth
- Jockey_3840x2160_120fps_420_8bit_HEVC_TS.ts (H.265) – Not perfectly smooth
- MHD_2013_2160p_ShowReel_R_9000f_24fps_RMN_QP23_10b.mkv (10-bit HEVC) – Not perfectly smooth
- phfx_4KHD_VP9TestFootage.webm (VP9) – 2 to 3 fps (software decode)
- BT.2020.20140602.ts (Rec.2020 compliant video; 36 Mbps; 59.97 Hz) – OK
- big_buck_bunny_4k_H264_30fps.mp4 – Not super smooth
- big_buck_bunny_4k_H264_60fps.mp4 – Not very smooth, audio delay (OK, as not supported by Allwinner H6)
- Fifa_WorldCup2014_Uruguay-Colombia_4K-x265.mp4 (4K, H.265, 60 fps) – OK
- Samsung_UHD_Dubai_10-bit_HEVC_51.4Mbps.ts (10-bit HEVC / MPEG-4 AAC) – Plays OK, but red parts are over-saturated?
- Astra-11479_V_22000-Canal+ UHD Demo 42.6 Mbps bitrate.ts (10-bit H.265 from DVB-S2 stream) – OK
- 暗流涌动-4K.mp4 (10-bit H.264; 120 Mbps) – ~2 fps (software decode – OK, as not supported by hardware)
- Ducks Take Off [2160p a 243 Mbps].mkv (4K H.264 @ 29.97 fps; 243 Mbps; no audio) – Not smooth
- tara-no9-vp9.webm (4K VP9 YouTube video @ 60 fps, Vorbis audio) – 2 to 3 fps (software decode), lots of buffering
- The.Curvature.of.Earth.4K.60FPS-YT-UceRgEyfSsc.VP9.3840×2160.OPUS.160K.webm (4K VP9 @ 60 fps + opus audio) – 2 to 3 fps (software decode), lots of buffering
Automatic frame rate switching is not working, but that’s only a small issue compared to the disastrous results above. ![]() As shown in the screenshot above, H.265 is hardware decoded, but for some videos the CPU usage is really high, close to 100% on all four cores, so something is clearly wrong. H.265 / H.264 1080p videos fare better, so maybe that’s why other people think Kodi works well. Maybe ZDMC, Zidoo’s fork of Kodi is coming soon.
As shown in the screenshot above, H.265 is hardware decoded, but for some videos the CPU usage is really high, close to 100% on all four cores, so something is clearly wrong. H.265 / H.264 1080p videos fare better, so maybe that’s why other people think Kodi works well. Maybe ZDMC, Zidoo’s fork of Kodi is coming soon.
In the meantime, I switched to Media Center, and it’s night and day compared to my experience with Kodi, also played from the same SAMBA share:
- HD.Club-4K-Chimei-inn-60mbps.mp4 (H.264, 30 fps) – OK most of the time, but the end is a bit choppy
- sintel-2010-4k.mkv (H.264, 24 fps, 4096×1744) – OK
- Beauty_3840x2160_120fps_420_8bit_HEVC_MP4.mp4 (H.265) – OK
- Bosphorus_3840x2160_120fps_420_8bit_HEVC_MP4.mp4 (H.265) – OK
- Jockey_3840x2160_120fps_420_8bit_HEVC_TS.ts (H.265) – OK
- MHD_2013_2160p_ShowReel_R_9000f_24fps_RMN_QP23_10b.mkv (10-bit HEVC) – OK
- phfx_4KHD_VP9TestFootage.webm (VP9) – OK
- BT.2020.20140602.ts (Rec.2020 compliant video; 36 Mbps; 59.97 Hz) – OK
- big_buck_bunny_4k_H264_30fps.mp4 – OK
- big_buck_bunny_4k_H264_60fps.mp4 – Plays but not smoothly, plus audio delay (OK, as not supported by Allwinner H6)
- Fifa_WorldCup2014_Uruguay-Colombia_4K-x265.mp4 (4K, H.265, 60 fps) – OK
- Samsung_UHD_Dubai_10-bit_HEVC_51.4Mbps.ts (10-bit HEVC / MPEG-4 AAC) – OK
- Astra-11479_V_22000-Canal+ UHD Demo 42.6 Mbps bitrate.ts (10-bit H.265 from DVB-S2 stream) – OK
- 暗流涌动-4K.mp4 (10-bit H.264; 120 Mbps) – Massive artifacts (OK, as not supported by Allwinner H6)
- Ducks Take Off [2160p a 243 Mbps].mkv (4K H.264 @ 29.97 fps; 243 Mbps; no audio) – OK
- tara-no9-vp9.webm (4K VP9 YouTube video @ 60 fps, Vorbis audio) – OK
- The.Curvature.of.Earth.4K.60FPS-YT-UceRgEyfSsc.VP9.3840×2160.OPUS.160K.webm (4K VP9 @ 60 fps + opus audio) – Not too bad, but not 100% smooth in all scenes. (Note: Most TV boxes struggle with this video).
I’m pretty happy with the results, and automatic frame rate switching works, it just need to be enabled in Advanced menu.
![]() Switching audio tracks and subtitles are supported by the app, and work well. SmartColor engine is specific to Allwinner processors, and may help improve the video quality, or adjust the image to your taste.
Switching audio tracks and subtitles are supported by the app, and work well. SmartColor engine is specific to Allwinner processors, and may help improve the video quality, or adjust the image to your taste.
![]()
Let’s carry on testing with PCM 2.0 (stereo) output to my TV, and HDMI audio pass-through to Onkyo TX-NR636 A/V receiver, with some advanced audio codec in Media Player.
| Audio Codec in Video |
PCM 2.0 Output |
HDMI Pass-through |
| AC3 / Dolby Digital 5.1 |
OK |
OK |
| E-AC-3 / Dolby Digital+ 5.1 |
OK |
OK |
| Dolby Digital+ 7.1 |
OK |
OK |
| TrueHD 5.1 |
OK |
OK |
| TrueHD 7.1 |
OK |
OK |
| Dolby Atmos 7.1 |
OK |
TrueHD 7.1 (OK) |
| DTS HD Master |
OK |
DTS 5.1 |
| DTS HD High Resolution |
OK |
DTS 5.1 |
| DTS:X |
OK |
DTS 5.1 |
Audio works pretty well with the only downside being a lack of support for DTS HD MA/HR which all fallback to DTS 5.1. My receiver does not support Atmos, so the box outputs TrueHD 7.1 as it should.
I’ve also tested HD videos with various bitrates:
- ED_HD.avi (MPEG-4/MSMPEG4v2 – 10 Mbps) – OK (except running scene that is not smooth)
- big_buck_bunny_1080p_surround.avi (1080p H.264 – 12 Mbps) – OK
- h264_1080p_hp_4.1_40mbps_birds.mkv (40 Mbps) – OK
- hddvd_demo_17.5Mbps_1080p_VC1.mkv (17.5Mbps) – OK
- Jellyfish-120-Mbps.mkv (120 Mbps video without audio) – HDD: OK
Most Linaro media and H.265 elecard samples are playing fine in Media Center:
- H.264 codec / MP4 container (Big Buck Bunny) – 1080p – OK
- MPEG2 codec / MPG container – 1080p – OK
- MPEG4 codec, AVI container – 1080p – OK
- VC1 codec (WMV) – 1080p – OK
- Real Media (RMVB), 720p / 5Mbps – Media Center app returns “Can’t play video”
- WebM / VP8 – 1080p – OK
- H.265 codec / MPEG TS container – 1080p – OK
The full HD Blu-ray ISO files I tested (Sintel-Bluray.iso and amat.iso) played fine, so were 1080i MPEG-2 samples. I had the usual artifacts with Hi10p videos, but audio and subtitles were displayed correctly.
I also tested a bunch of 720p/1080p movies with various codecs/containers such as H.264, Xvid, DivX, VOB / IFO, FLV, AVI, MKV, MP4, etc… Most could play, except some of my FLV video samples, and DVD Rips would show the “This is a Blu-ray folder” pop-up…
![]() … but the app would also report “Can’t play video”. If I browse to the folder, and select the IFO, it does not work, and the only way to start is to select a VOB file. However, it does not automatically switch to the next file. So there’s a problem with DVD rips in Media Center app.
… but the app would also report “Can’t play video”. If I browse to the folder, and select the IFO, it does not work, and the only way to start is to select a VOB file. However, it does not automatically switch to the next file. So there’s a problem with DVD rips in Media Center app.
YouTube app could play videos up to 1440p, but 4K (2160p) is not an option.
I’ve shot a video to show issues in Kodi, as well as Media Center app which work pretty well, and YouTube playback up to 1440p.
[embedded content]
DRM Info app shows Widevine DRM L1 is supported, meaning one of the requirements for Full HD Netflix is fulfilled.
![]()
Click to Enlarge
The company – as we’ve seen in the firmware changelog – claims support for Netflix 1080p, but since I don’t have an account I could not confirm that. It’s also unclear whether this has been achieved through a hack, or a partnership with Netflix. The latter would be permanent, while the former may not work in a few months. Based on info gathered on Zidoo forums, I can see other boxes like Mecool M8S Pro Plus TV box can play Netflix 1080p through a “3rd party Android TV Firmware”, so it’s likely something similar has been implemented for H6 Pro.
Network & Storage Performance
Zidoo X7 had a somewhat asymmetrical performance while copying a 278 MB file over 802.11ac + SAMBA, and Zidoo H6 Pro appears to have the same issues:
- Server to flash (average): 51, or around 5.45 MB/s
- Flash to server (average): 3 minutes 22 seconds, or around 1.37 MB/s
So excellent download performance, but weak upload performance with SAMBA. The average is around 2.24 MB/s.
![]()
Throughput in MB/s – Click to Enlarge
It’s probably a SAMBA configuration/implementation issue, as testing with iperf shows good performance in both directions:
|
|
Client connecting to 192.168.0.116, TCP port 5001
TCP window size: 85.0 KByte (default)
––––––––––––––––––––––––––––––
[ 3] local 192.168.0.104 port 50990 connected with 192.168.0.116 port 5001
[ ID] Interval Transfer Bandwidth
[ 3] 0.0-60.0 sec 1.41 GBytes 202 Mbits/sec
|
|
|
Server listening on TCP port 5001
TCP window size: 85.3 KByte (default)
––––––––––––––––––––––––––––––
[ 4] local 192.168.0.104 port 5001 connected with 192.168.0.116 port 48993
[ ID] Interval Transfer Bandwidth
[ 4] 0.0-60.0 sec 1.55 GBytes 221 Mbits/sec
|
![]()
Throughput in Mbps
I also tested Gigabit Ethernet with iperf:
|
|
Client connecting to 192.168.0.114, TCP port 5001
TCP window size: 468 KByte (default)
––––––––––––––––––––––––––––––
[ 6] local 192.168.0.104 port 44808 connected with 192.168.0.114 port 5001
[ ID] Interval Transfer Bandwidth
[ 6] 0.0-60.0 sec 2.45 GBytes 350 Mbits/sec
[ 4] 0.0-60.0 sec 5.30 GBytes 758 Mbits/sec
|
|
|
[ 5] local 192.168.0.104 port 5001 connected with 192.168.0.114 port 49130
[ 5] 0.0-60.0 sec 5.65 GBytes 809 Mbits/sec
|
|
|
[ 3] local 192.168.0.104 port 44852 connected with 192.168.0.114 port 5001
[ ID] Interval Transfer Bandwidth
[ 3] 0.0-60.0 sec 4.89 GBytes 699 Mbits/sec
|
That’s pretty good, and fairly close to the results I got with ROCK64 Board (RK3328).
Switching to store benchmarks with A1 SD Bench.
![]()
Click to Enlarge
The cached read is due to the incredibly low exFAT write performance (1.52 MB/s). Read speed is quite weak to at 16.37 MB/s with this file system, but poor exFAT performance is a common to most Android TV boxes. NTFS is much better at 59.07MB/s read, and 42.12 MB/s but still far from the ~100MB/s R/W, I achieved with the same hard drive on ROCK64 board. Nevertheless the performance will be good enough for TV box use case. However, if you need hardware with fast storage (through USB 3.0) and Ethernet, RK3328 processor looks to be better.
Internal performance is good, and helps explain relatively fast boot (when no HDD is connected), fast app loading, and the lack of “app not responding” issues.
Gaming
I installed three games: Candy Crush Sage, Beach Buggy Racing (BBR) and Riptide GP2. I played Candy Crush with my air mouse, and no problem here. I played the two racing games with Tronsmart Mars G01 game controller, and BBR played very smoothly even with max graphics settings. Riptide GP2 was quite playable with max “resolution”, maybe at 25 to 30 fps, but not quite close to 60 fps. I feel Allwinner H6 might be a little better at playing games than Rockchip RK3328, and somewhat comparable to Amlogic S905/S905X. I played both games for around 30 minutes in total, and I did not notice any drop in performance over time, so no obvious throttling/overheating, despite the rather high CPU/GPU temperatures reported by CPU-Z.
Bluetooth
I’ve used Bluetooth more than on any other TV boxes simply because of the Bluetooth remote control. But I could also pair the TV box (seen as petrel-p1) with Xiaomi Mi A1 smartphone, and transfer a few photos over Bluetooth, watch some YouTube video using X1T Bluetooth earbuds, but while I was able to see and pair my BLE fitness tracker in the Bluetooth settings, I was never able to locate the smart band from within “Smart Movement” app.
Zidoo H6 Pro (Allwinner H6) System Info and Benchmarks
CPU-Z still shows a quad core Cortex A53 r0p4 processor clocked between 480 MHz and 1.80 GHz, and a Mali-T720 GPU. Note that I never saw the frequency goes over 1488 MHz, so that 1.80 GHz may only occur during short bursts if at all.
![]()
Click to Enlarge
1906 MB total memory was reported, and 10.22 GB storage. Screen resolution was 1920×1080. As with most Allwinner platform you’ll never get a recent kernel (Linux 3.10.65).
The device achieved 40,467 points in Antutu 6.x, or about 5,000+ more compared to competitors based on RK3328 or S905X.
![]()
Click to Enlarge
One of the big jump is with 3D graphics, but there’s an easy explanation: Rockchip RK3328 and Amlogic S905X SoCs rely on Mali-450MP GPU which does not support OpenGL ES 3.1 used by “Marooned” benchmark, meaning Allwinner H6 just gets 3,510 points extra just for supporting OpenGL ES 3.1… So in reality, there’s not so much performance difference between the performance.
![]() Vellamo 3.x confirms Allwinner H6 is that much faster with the following scores: Browser: 2,546 points, Metal: 930 points, and Multicore (836 points). I’ll put aside Multicore as on the test failed because of an issue with sysbench: “issue with Finepar: Invalid CPU mode”. But when comparing the metal score result against Amlogic S905X (910) and Rockchip RK3328 (937), the differences are minor.
Vellamo 3.x confirms Allwinner H6 is that much faster with the following scores: Browser: 2,546 points, Metal: 930 points, and Multicore (836 points). I’ll put aside Multicore as on the test failed because of an issue with sysbench: “issue with Finepar: Invalid CPU mode”. But when comparing the metal score result against Amlogic S905X (910) and Rockchip RK3328 (937), the differences are minor.
![]()
Click to Enlarge
The Ice Storm Extreme score (3,951 points) is about the same as Amlogic S905X (4,183 points), but quite better than Rockchip RK3328 (2,252 points). We can also see the CPU frequency never surpassed around 1.5 GHz, so I’m wondering whether the 1.8 GHZ reported by CPU-Z might just be for show/marketing…
Conclusion
Despite Allwinner H6 SoC being pretty new, I have not found any really critical bugs in Zidoo H6 Pro TV Box. 4K video playback is working well in Media Center app with automatic frame rate switching, and HD audio pass-through, and overall performance is good, including for Wifi, Ethernet and storage.Widevine Level 1 DRM is installed, and the device is also supposed to support Netflix HD playback (not tested). 3D graphics performance is closer to the one of Amlogic S905X ,and quite better than on Rockchip RK3328 SoC.
The biggest issues I’ve found is poor support for Kodi with most 4K videos I’ve tried not playing well, and red color is over-statured in many videos. Media Center app also have a few limitations such as no support for DTS HD HR/MA pass-through (fallbacks to DTS 5.1), and IFO (DVD Rip) & Real Media video files are not supported. Other issues include poor exFAT performance, and WiFi SAMBA upload speed.
PROS
- Android 7.0 operating system – Stable and responsive
- Eye-pleasing ZIUI launcher / user interface
- Very good support for 4K videos played in Media Center app with automatic frame rate switching support; Smart Color Engine for post-processing
- HDMI pass-through for Dolby, DTS, and Dolby TrueHD working in Media Center app
- Relatively fast eMMC flash storage (fast boot/app loading)
- Very good networking performance for Gigabit Ethernet and 802.11ac WiFi (except for SAMBA uploads)
- Bluetooth remote control
- Decent 3D graphics performance
- Widevine Level 1 DRM; Netflix HD support (not tested)
CONS (and bugs)
- Kodi 17.5 from Google Play struggles to play 4K videos and color issues (too much red)
- MediaCenter – No DTS HD pass-through support (DTS 5.1 instead); IFO (DVD rip) and Real Media (RM) videos not supported, some FLV files can’t play.
- YouTube limited to 1440p (no 2160p option for me)
- Poor SAMBA upload performance when using WiFi
- exFAT file system performance poor -> use NTFS instead on external hard drive
- Slow boot time (~1 minute 30 seconds) when hard drive with many files connected
- “OK” button stopped to work on the Bluetooth remote control once (despite still working on the air mouse). Reboot fixed the issue.
Zidoo kindly sent the review sample from a local distributor. Resellers can contact the company via H6 Pro’s product page. GeekBuying currently has a promotion for the device where you can get it for as low as $79.99 (only for the first 50 orders), but it’s also sold on other websites for about $85 to 100 including GearBest, Amazon, or Aliexpress.
Tweet Zidoo H6 Pro is the very first Allwinner H6 based 4K TV box. The Android 7.0 device support H.265, H.264 and VP6 4K video decoding, comes with fast interfaces…

 Intel provided a few more details about the initiative in their announcement, highlighting the following points: